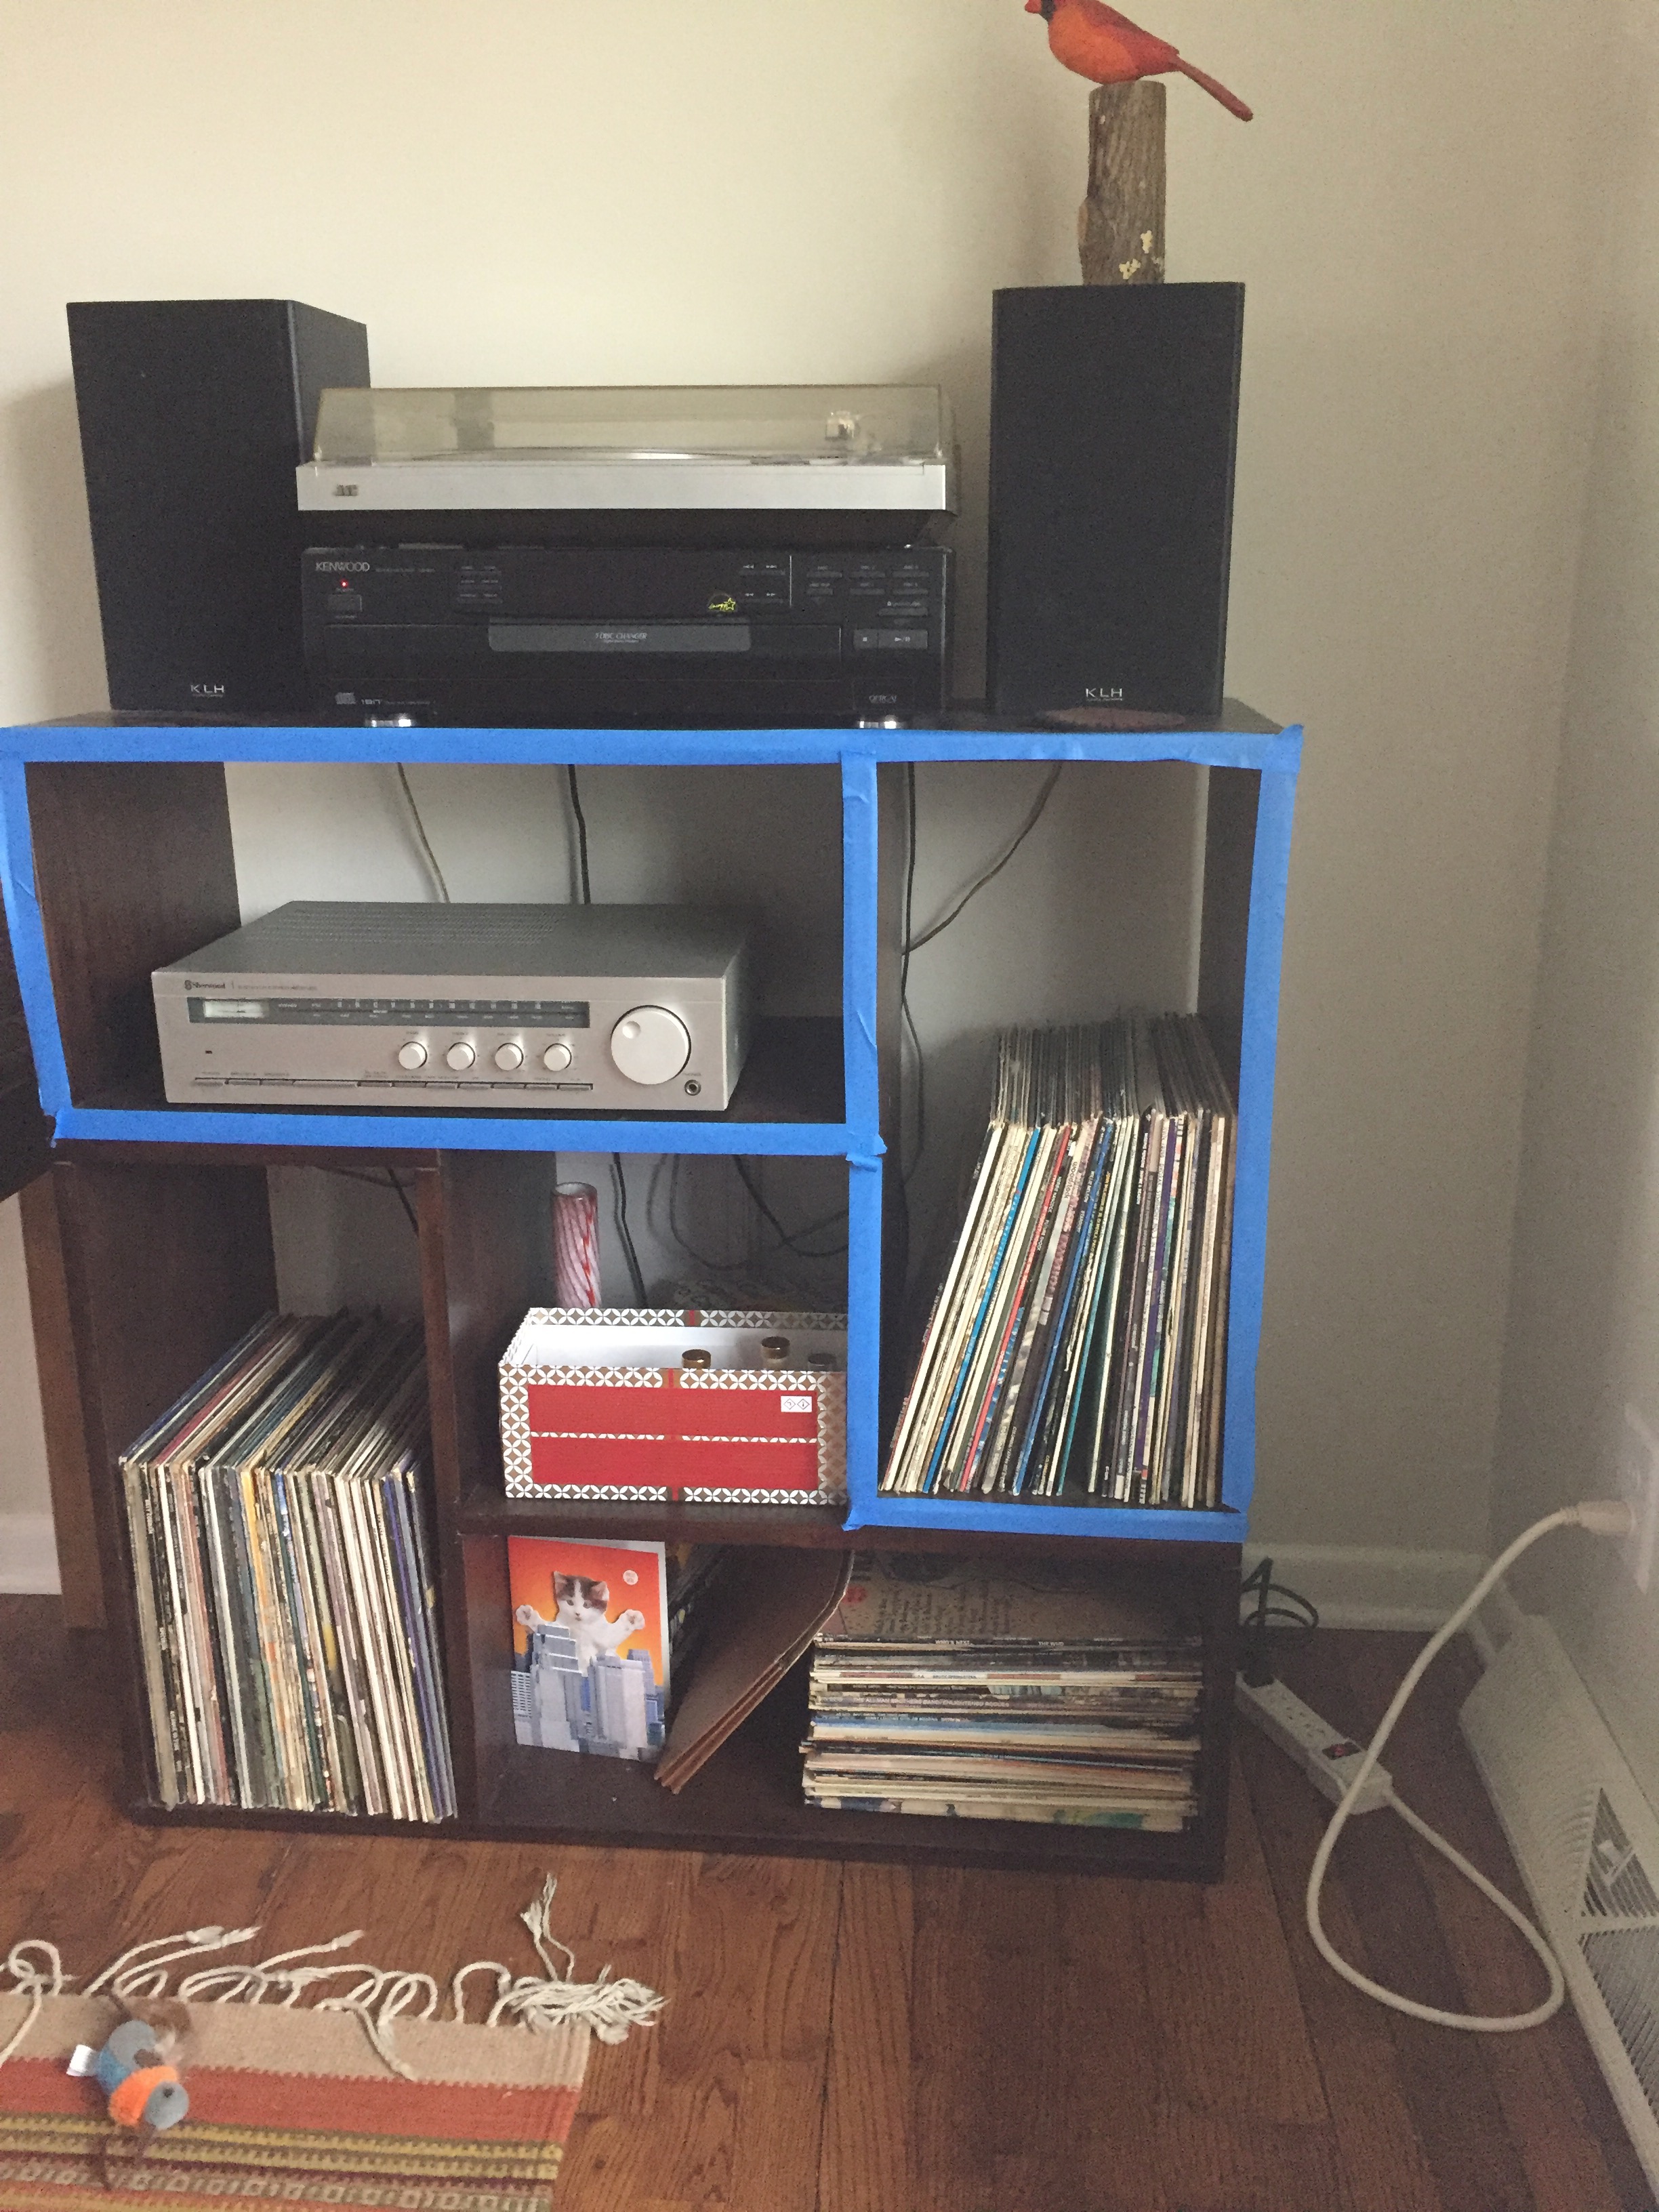
I received a text from Sandy requesting I replicate a set of shelves they own. They plan to assemble a set of these to serve as a support for their television. Sandy sent a photo of the pair of shelves they currently own. As can be easily seen they each consist of an L-shape set of two linked boxes. She would like to have four more versions of the same.
She also sent dimensions, which have been translated into the following plan. The photo shows that all joints are butt joints except the one horizontal board meeting the vertical board at the halfway point. This joint is a dado joint. This dado is not shown in the plan below. I decided to use plywood after considering the options. The box shelves are 14" deep and no boards come in that width. Buying wide boards is risky as many will be warped. Purchasing 8" wide boards and gluing them up to make wider boards seemed like a difficult task considering 44' is needed.
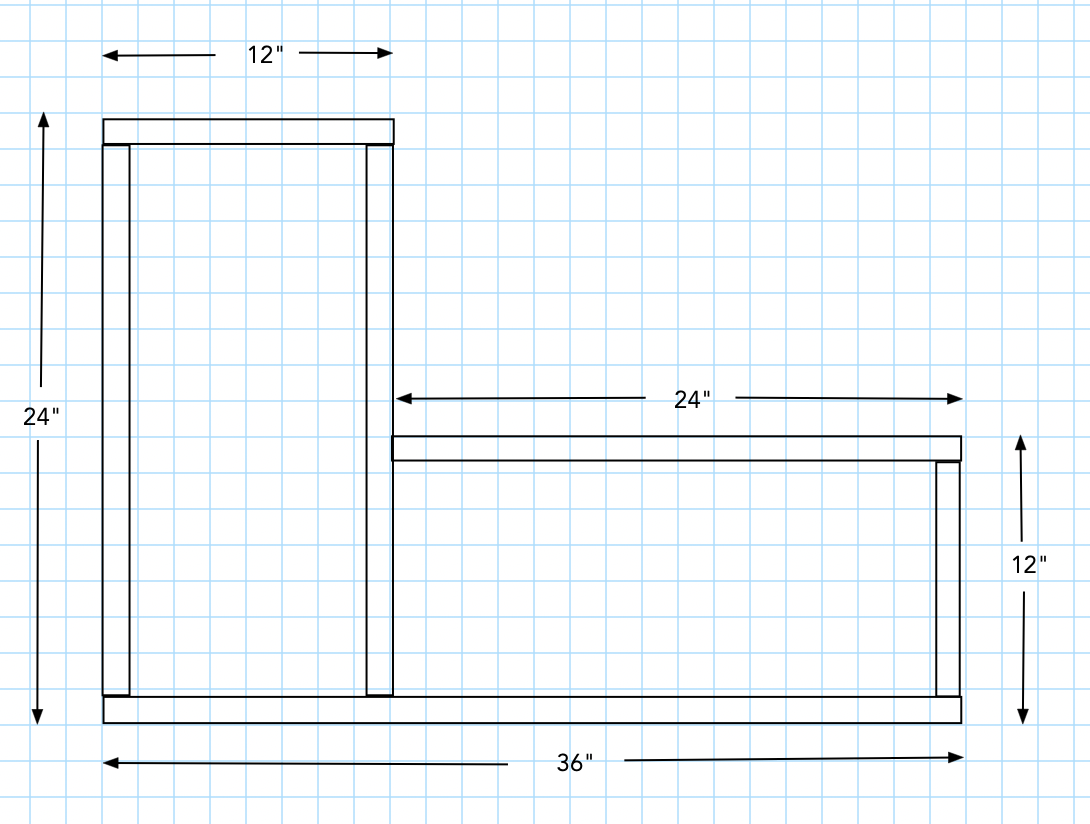
Sandy and I picked up the plywood yesterday. I also purchased a dowel jig, dowels and veneer edging. Doweled joints will be much stronger than butt joints. The plywood was measured and is 0.720" thick. This dimension and the minimalist plan above determined the dimensions of the various parts shown in the table below. For the parts that sit between two widths of plywood their dimension is the dimension given in the plan minus 2 X 0.72" or 1.44". Also not pictured in the plan is the dado that the 24" top fits into. The picture Sandy sent indicates a 1/8" deep dado. I will use 1/4" to be a little safer.
| Name | Number | Dimensions |
|---|---|---|
| Short Top | 1 | 12" X 14" |
| Long Vertical | 2 | 22 9/16" X 14" |
| Long Top | 1 | 24 1/4" X 14" |
| Bottom | 1 | 36" X 14" |
| Right Side | 1 | 10 9/16" X 14" |
With the dimensions in hand a cutting diagram was laid out. The 14" width leaves 5" X 96" strip if three 14" wide lengths are cut from a sheet. It is reasonably easy to apportion two box shelves worth of parts across these three strips. I settled on one strip used for two 24 1/4" tops and two 22 9/16" verticals. One strip will be cut into two 36" bottoms and one 22 9/16" vertical. The third strip will make one 22 9/16" vertical, two 12" tops, and two 10 9/16" ends. This leaves 28" in the last strip for CMA. So the two sheets purchased are enough material for four box shelves.
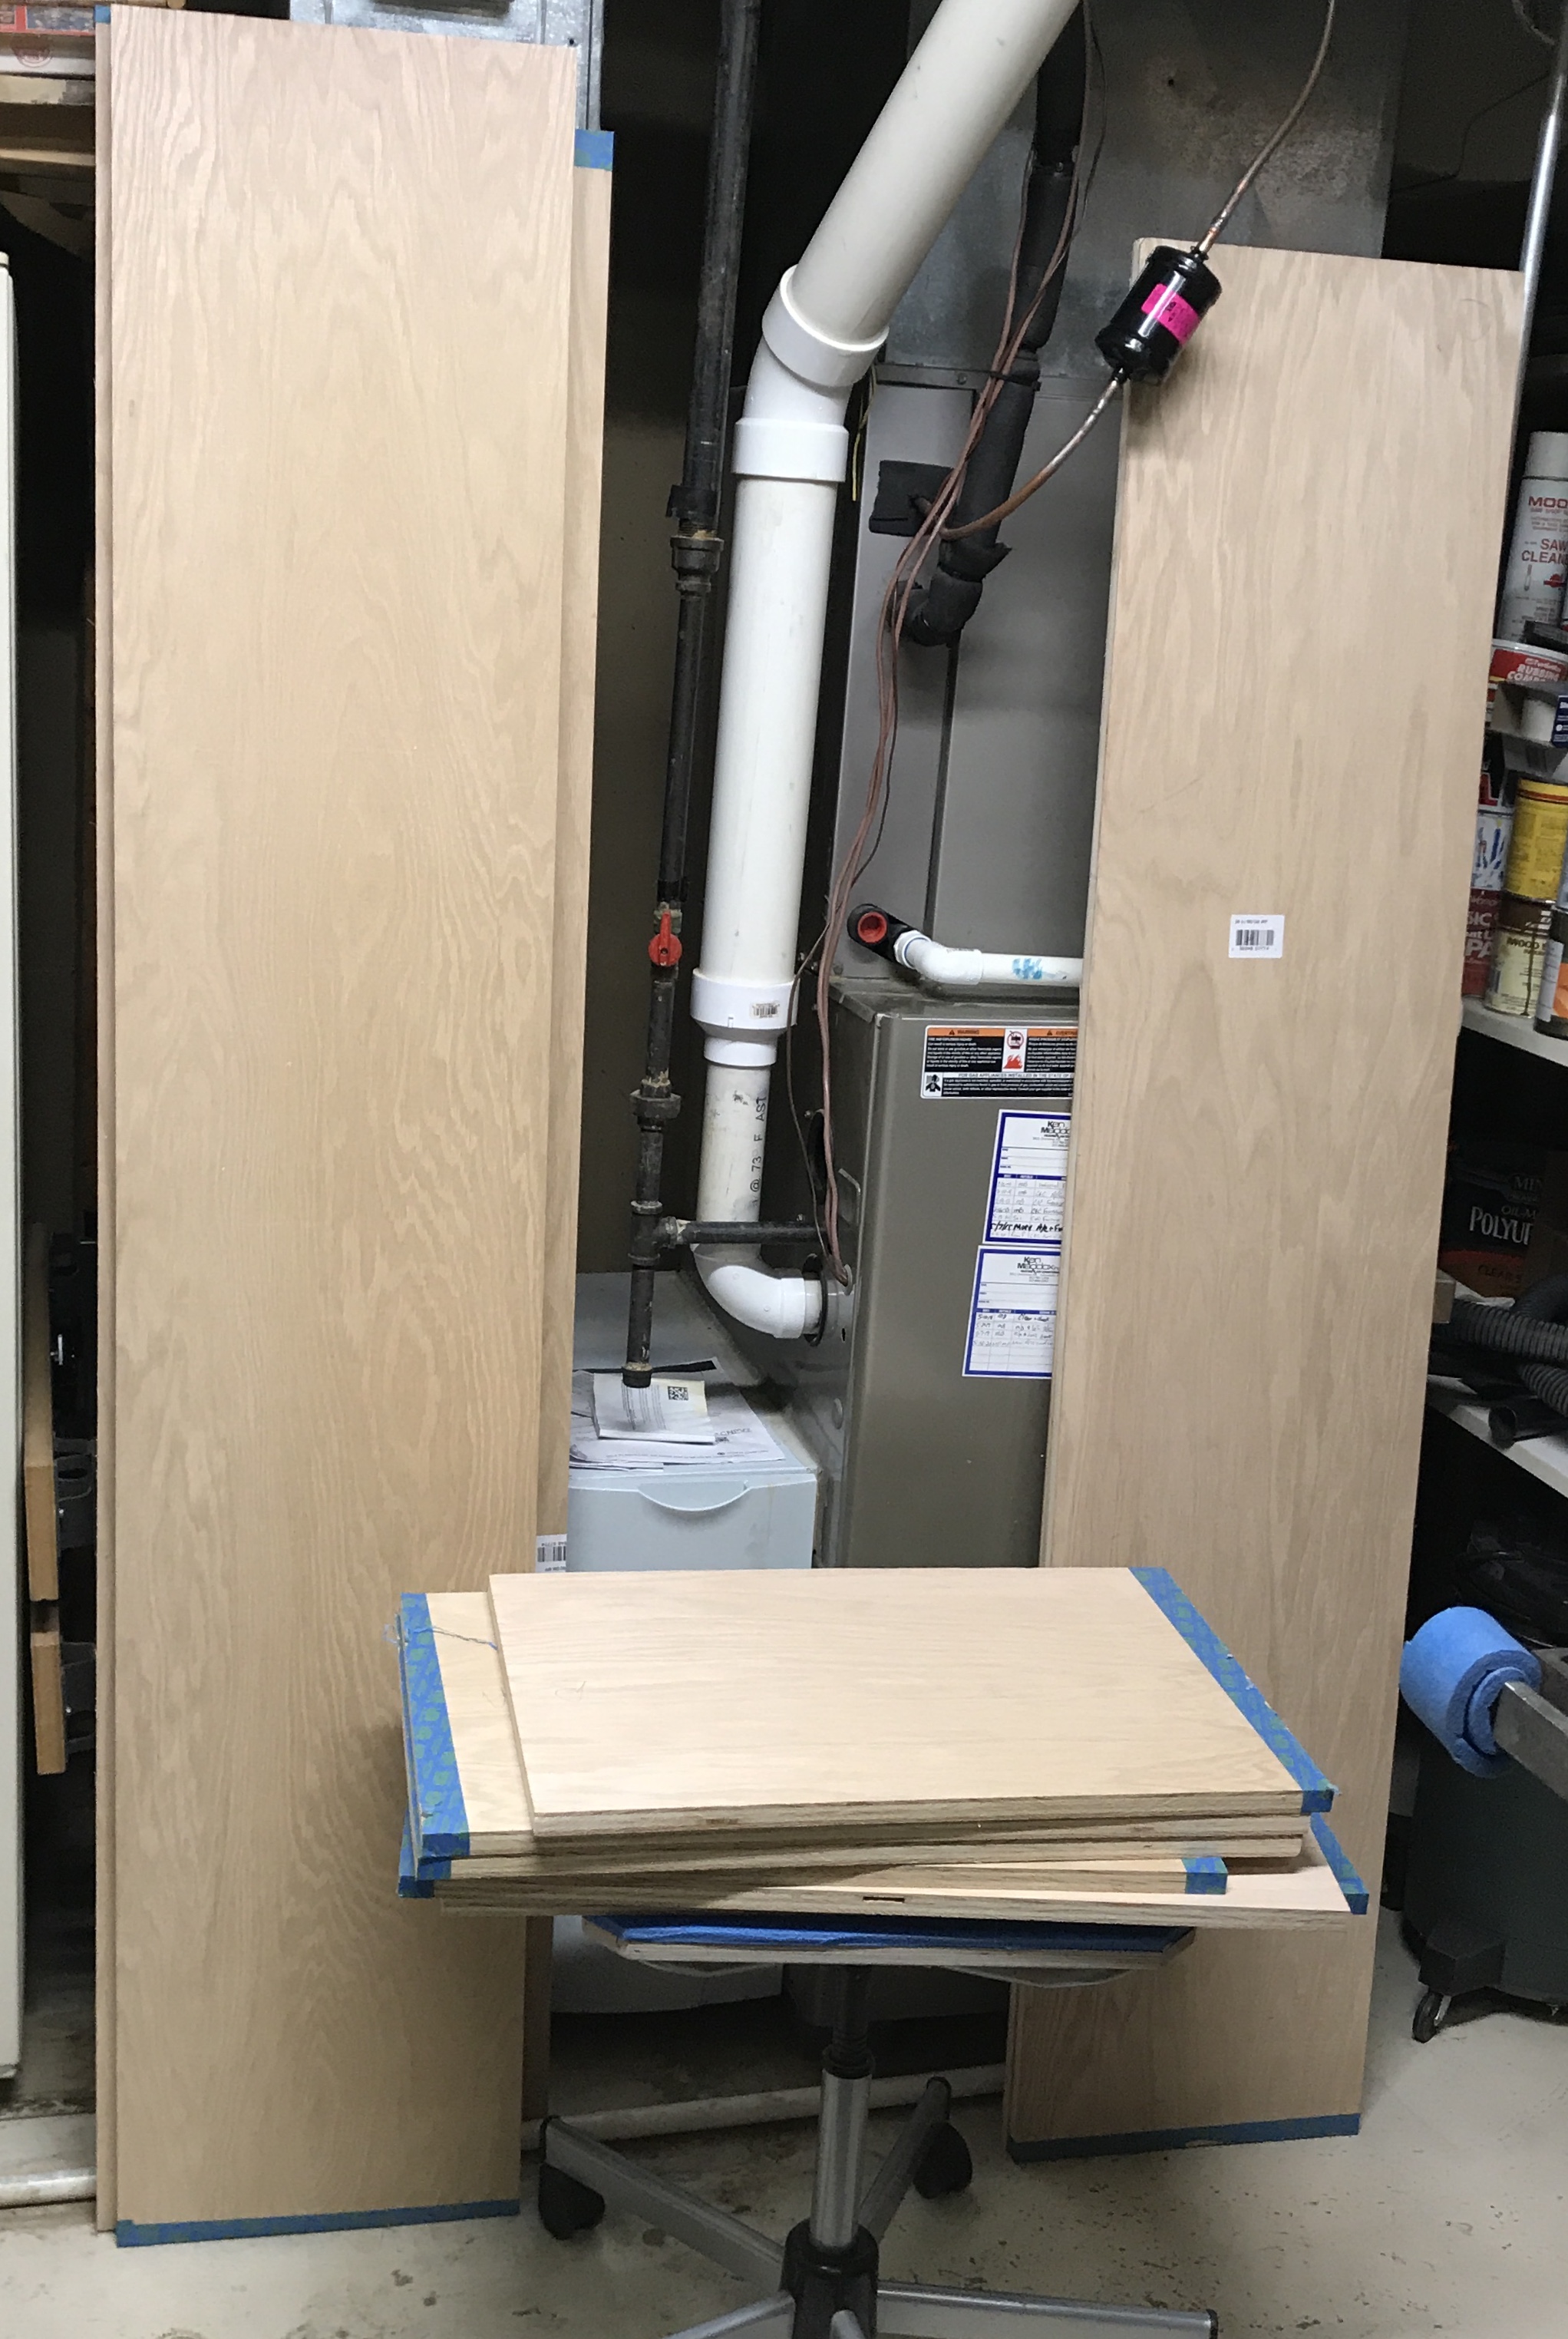
The plan is to do all of the plywood cutting in the garage using a straight edge to guide the circular saw. Supporting the 4' X 8' sheets evenly and up off the floor is the only challenge. Both sides will be taped prior to cutting to minimize tearout. The plywood supposedly only has the fine veneer on one side. The backside is marked grade A. I checked both faces and could not tell the difference. I will only mark the faces if there is some damage to one. Four verticals will be labeled. A dado will be cut in these verticals on the table saw. Doweling will be practiced on scraps. Once proficient in doweling with the new jig, the four boxes will be assembled in the following order. The 12" top will be attached to the two verticals making sure one has an outfacing dado. This will set the dowel distances in the bottom, which will be attached next. The short vertical will be attached followed by the 24" top.
After thinking on this overnight I found a solution that also solves a different problem. The plywood came with two sheets of crappier wood for protection. One sheet was broken up by hand and pitched. The other is an ok 1/2" sheet of OBS sheathing. I was not sure how to use or get rid of this sheet. So it will be used to support the plywood while cutting and will minimize tearout on that face.
Doweling will use four or five dowels per joint With four dowels the two outside dowels will be 1 3/4" in from the edge and the dowels will be separated by 3 1/2". For five dowels the two outside dowels will be 1.4" inside the edges and the dowel separation would be 2.8". No dowels will be used in the dado. I am leaning toward four, since there are 24 dowels per box and four boxes.
Started cutting this morning in the 30° garage. The door was left open for more light. The 8' edge guide was clamped 5 1/8" beyond the desired 14" wide board. This measurement was checked before every cut. The plywood was set on the scrap sheet with two scraps of 1/2" plywood supporting the free side. The edge guide could not be clamped if it was above the scrap sheet, so the cut marks were close to one side of the scrap sheet. The cuts went well with no tape and no tearout. This is probably due to cutting in the same direction as the veneer grain. The last cut on each sheet of plywood needed the saw oriented in the opposite direction so the edge guide was set 1 5/8" beyond 14". Six 14" X 96" boards were produced. I was too cold to cut any more so the floor was swept and the car pulled back into the garage.
Like the fool I am I ventured back out this afternoon. Wet snow was falling. In order to do most of the cutting to length on the table saw a few more cuts were needed. Based on the cutting diagram one 23-27" section could be cut off of each of the 14" wide boards giving a length of board that will fit in the basement shop. There is about 55" from blade to furnace, and probably 30" on the opposite side. So if the boards can be reduced to about 80" and a 24" length is removed the table saw can be used. To this end each board was marked A, B, or C. 25.5" was marked on two A's which individually taped. They were clamped side to side and laid on 3/4" scrap. They were marked 5 1/8" longer and the edge guide clamped at these marks. Both boards were cut at once. This process was repeated with the B boards cut at 23" and the C boards cut at 27". The garage was cleaned again and the tools and wood were transported to the basement.
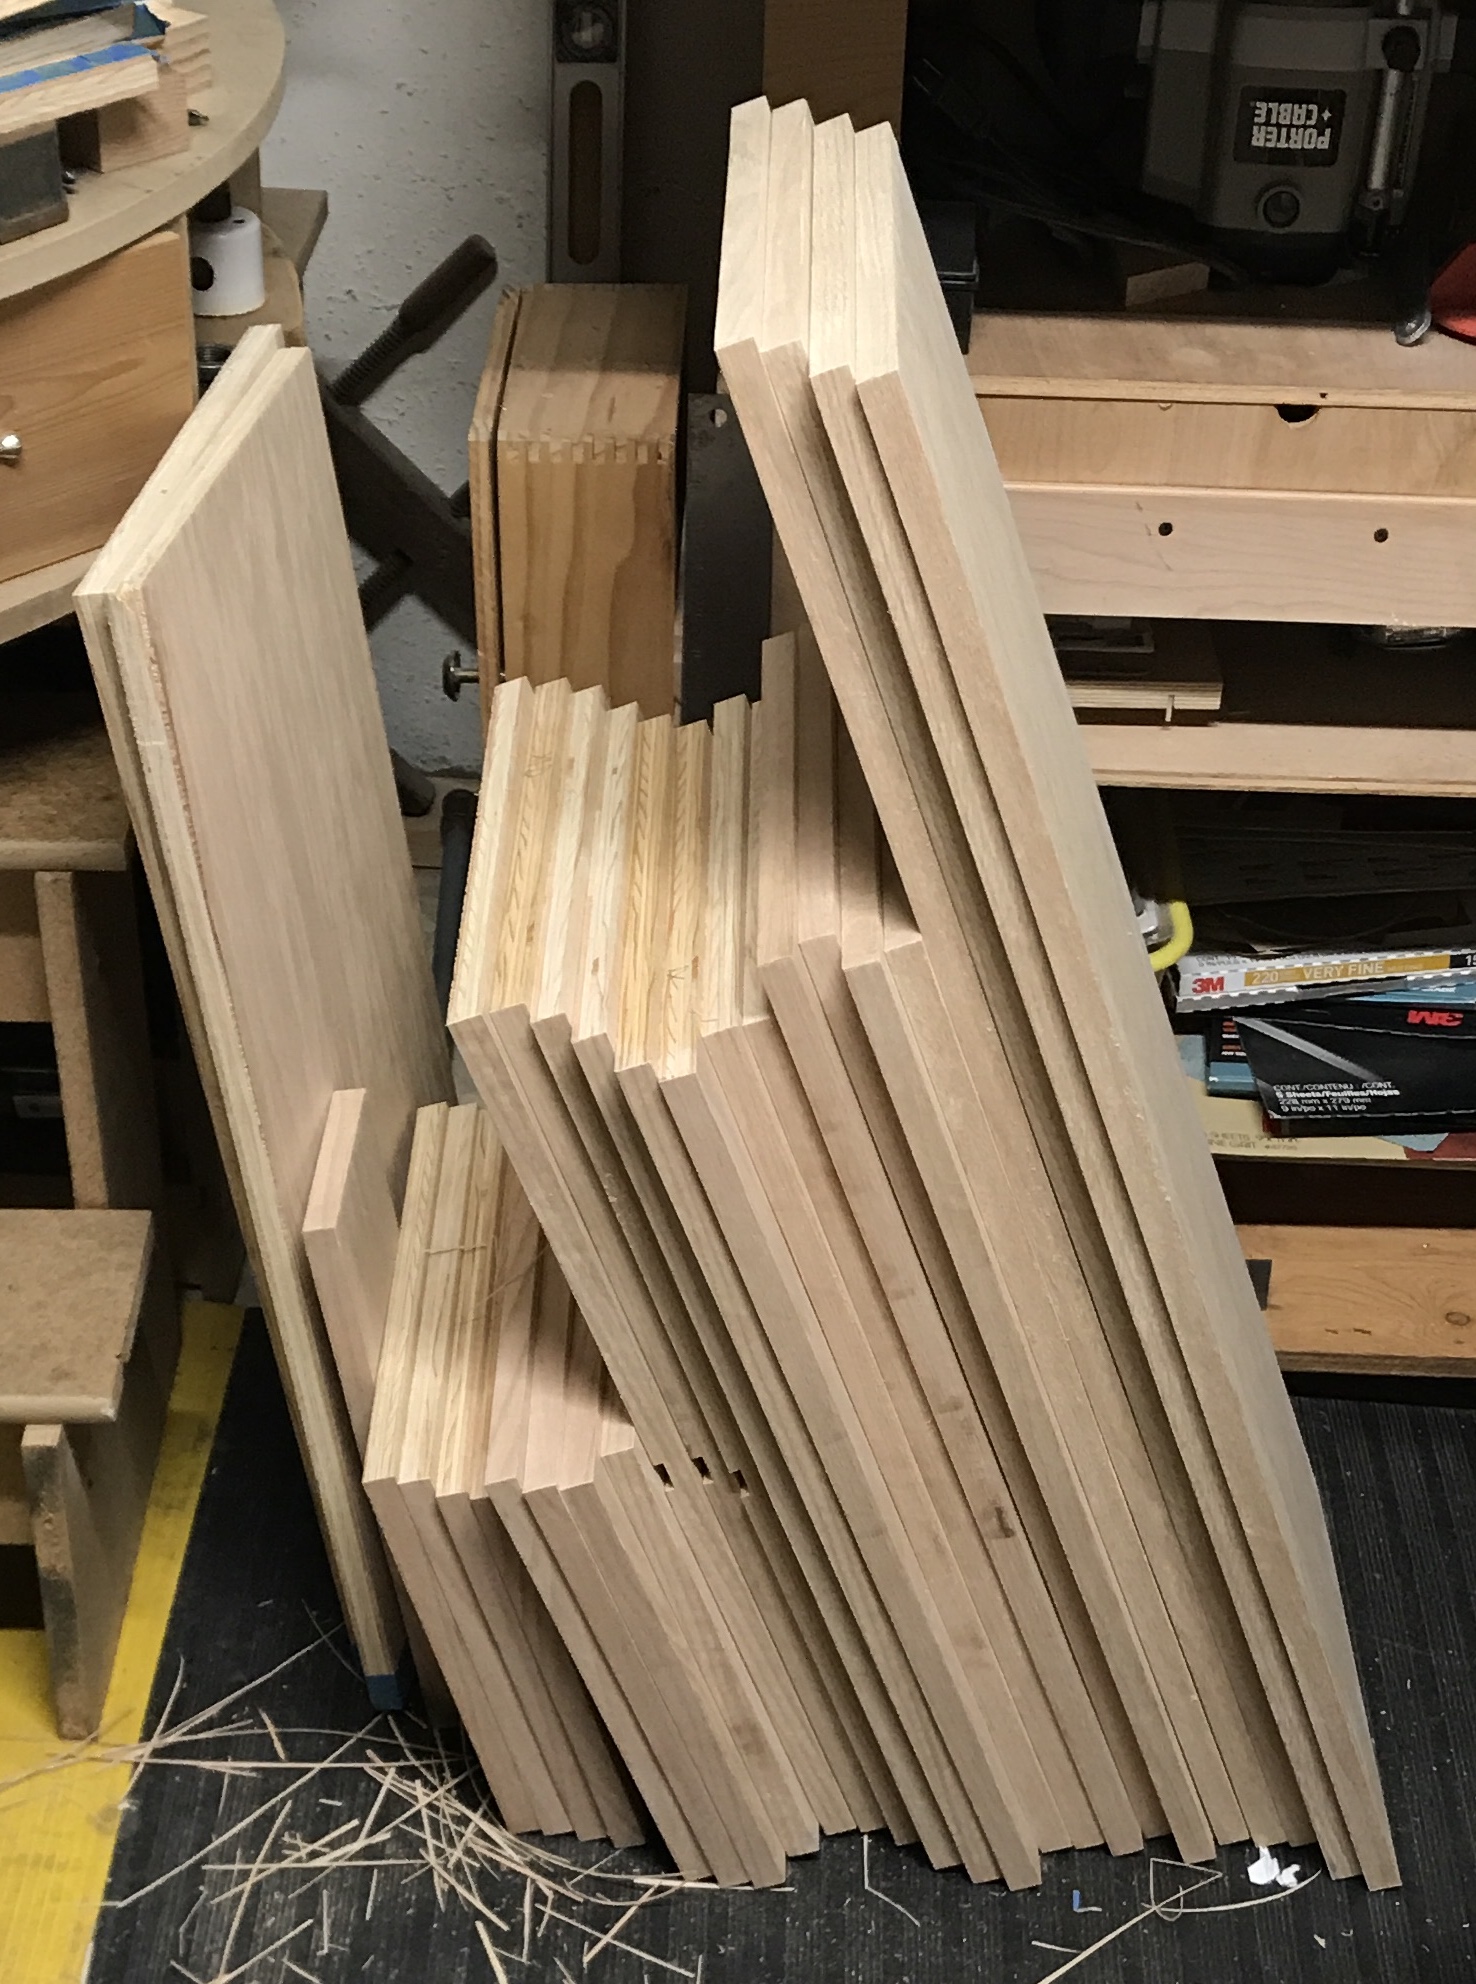
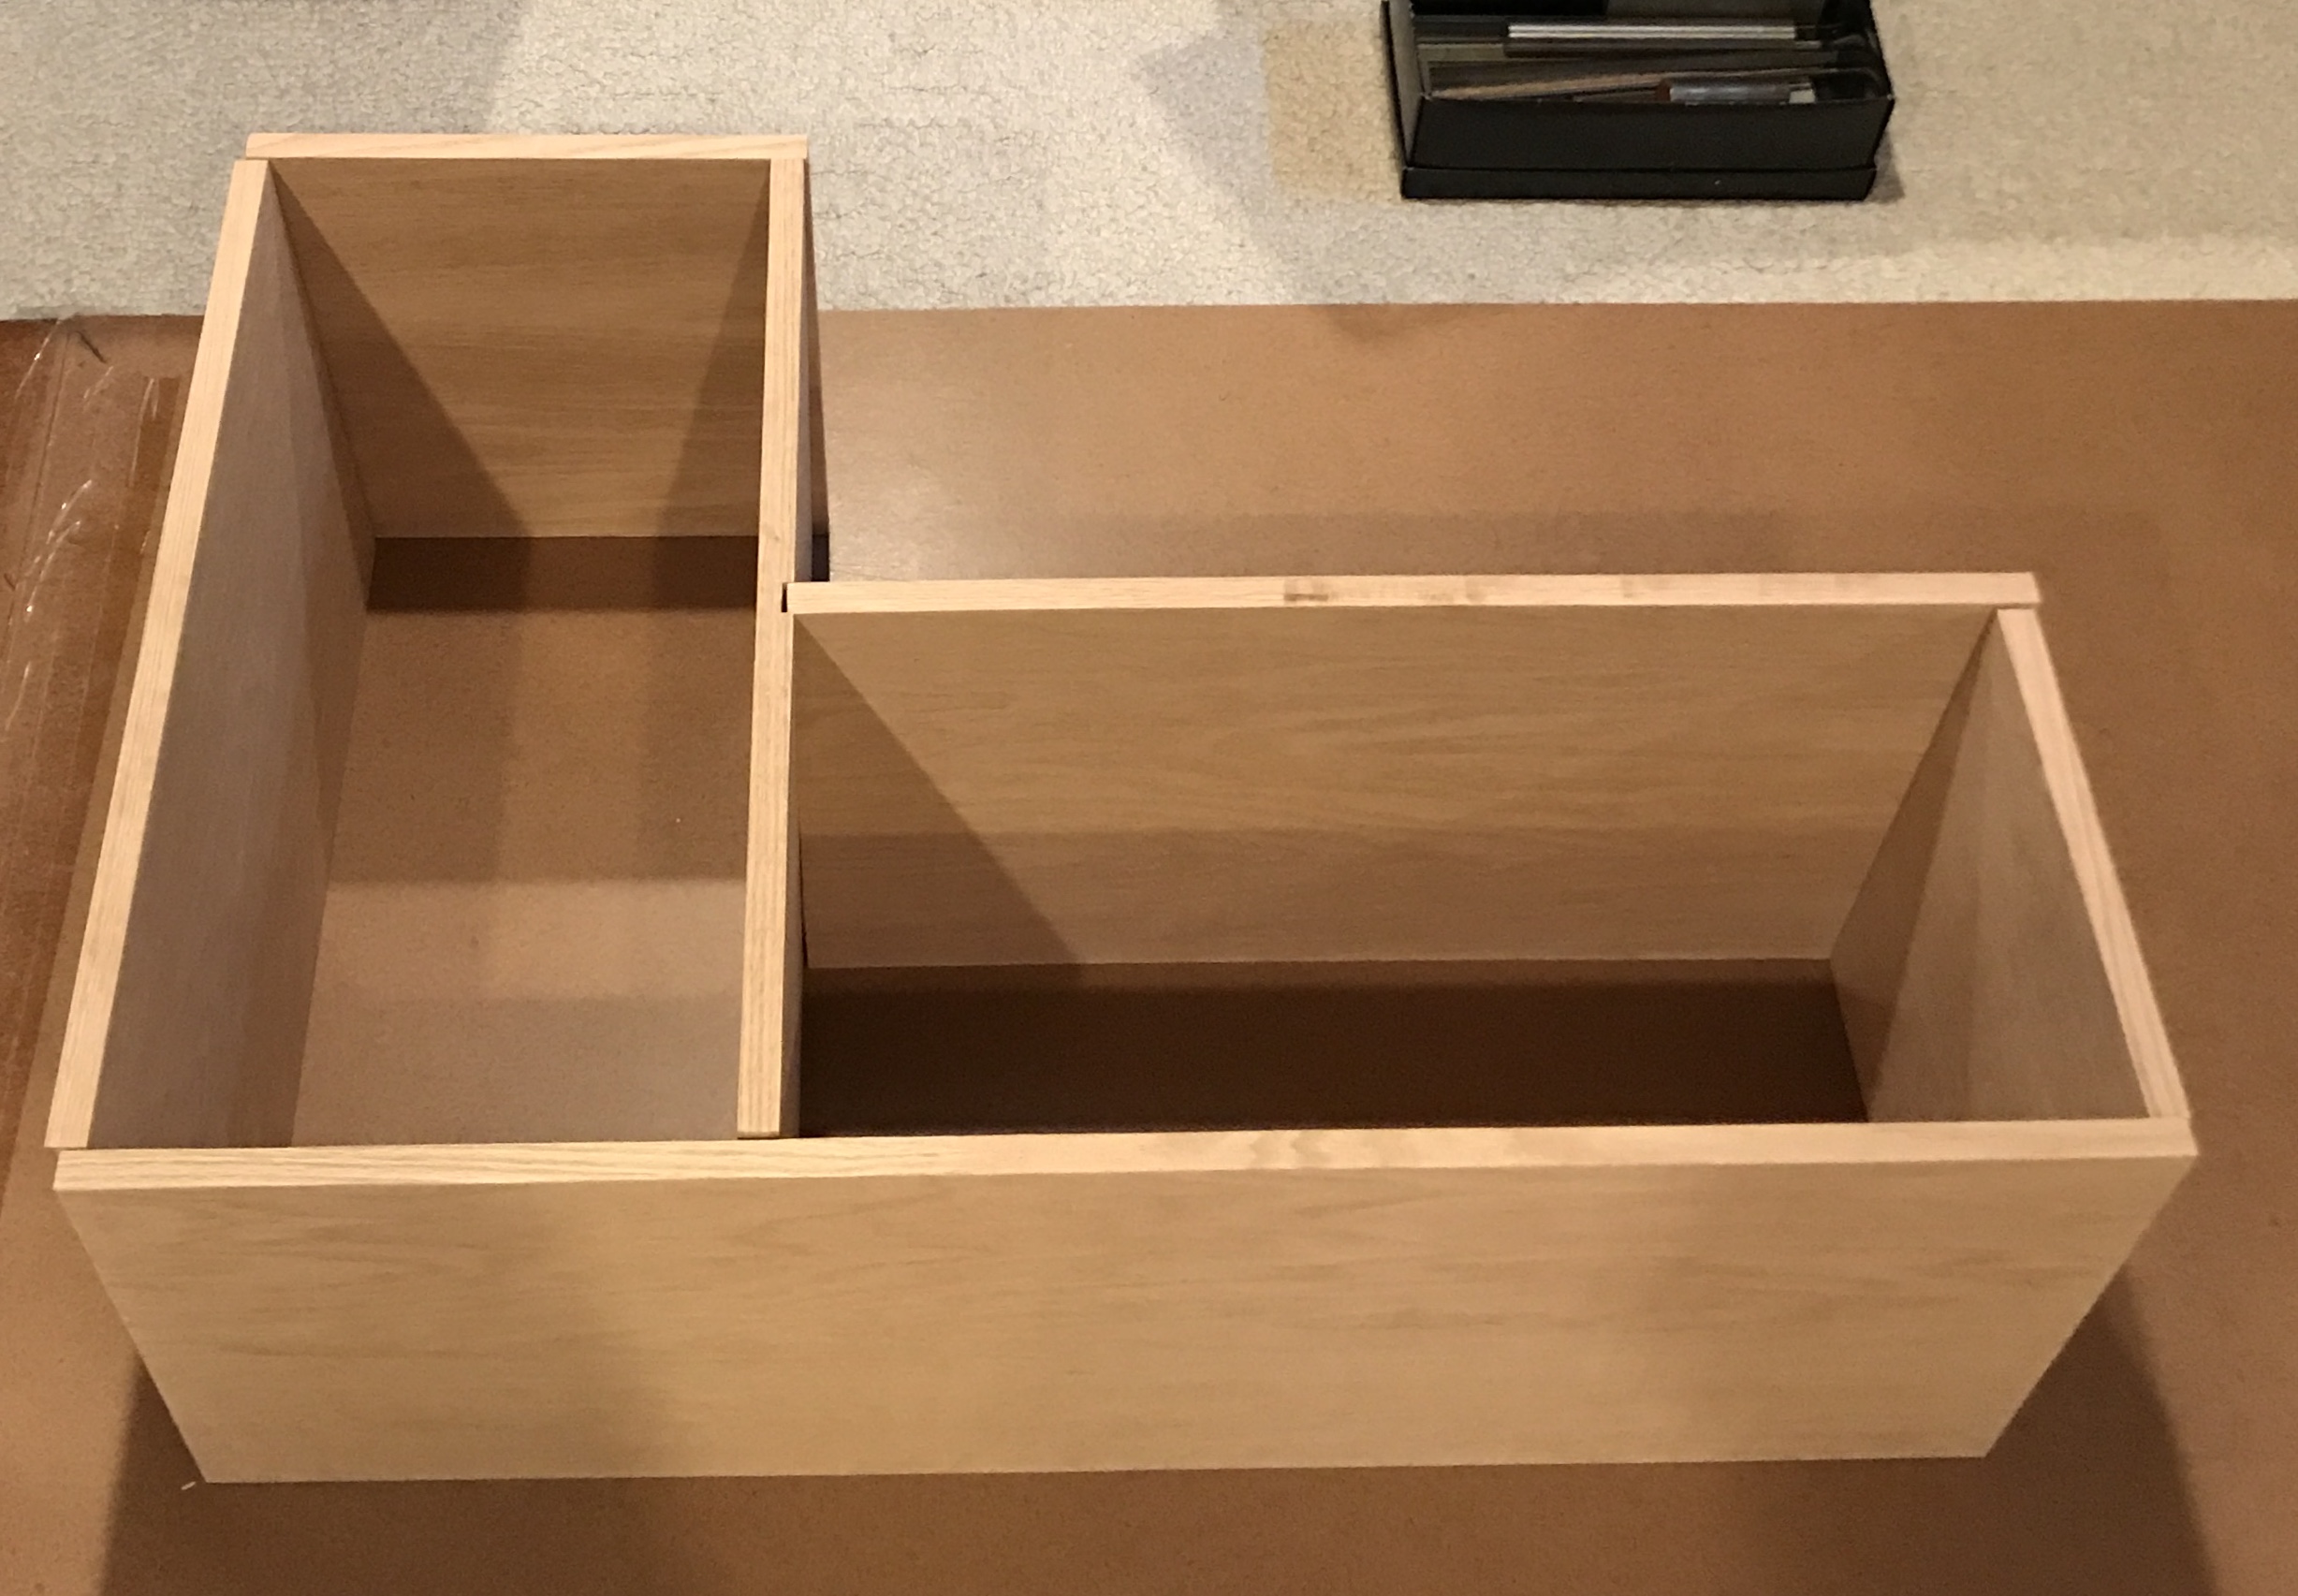
This morning was productive. Each of the boards was measured, marked, aligned and cut. The boards meant to produce multiple parts went through this cycle multiple times. One of the boards was about 1/8" wider than the rest. After cutting out a vertical and two bottoms from it these three parts were cut to match the rest at 14". Tape was used for each cut. The painter's tape eventually ran out and was replaced with masking tape, which seemed to work just as well. All of the cuts were made with the crosscut sled. For the larger pieces being cut off it was necessary to have more support on the right side of the blade. An auxiliary table was added to the right side and it was shifted back about 8". It was also necessary to add 1/2" of support just to the right of the blade to match the crosscut sled height. Each part is labelled 1-5. The 24 parts are shown in the photo below. There are two boards, 14" X 26", remaining in case there is a need.

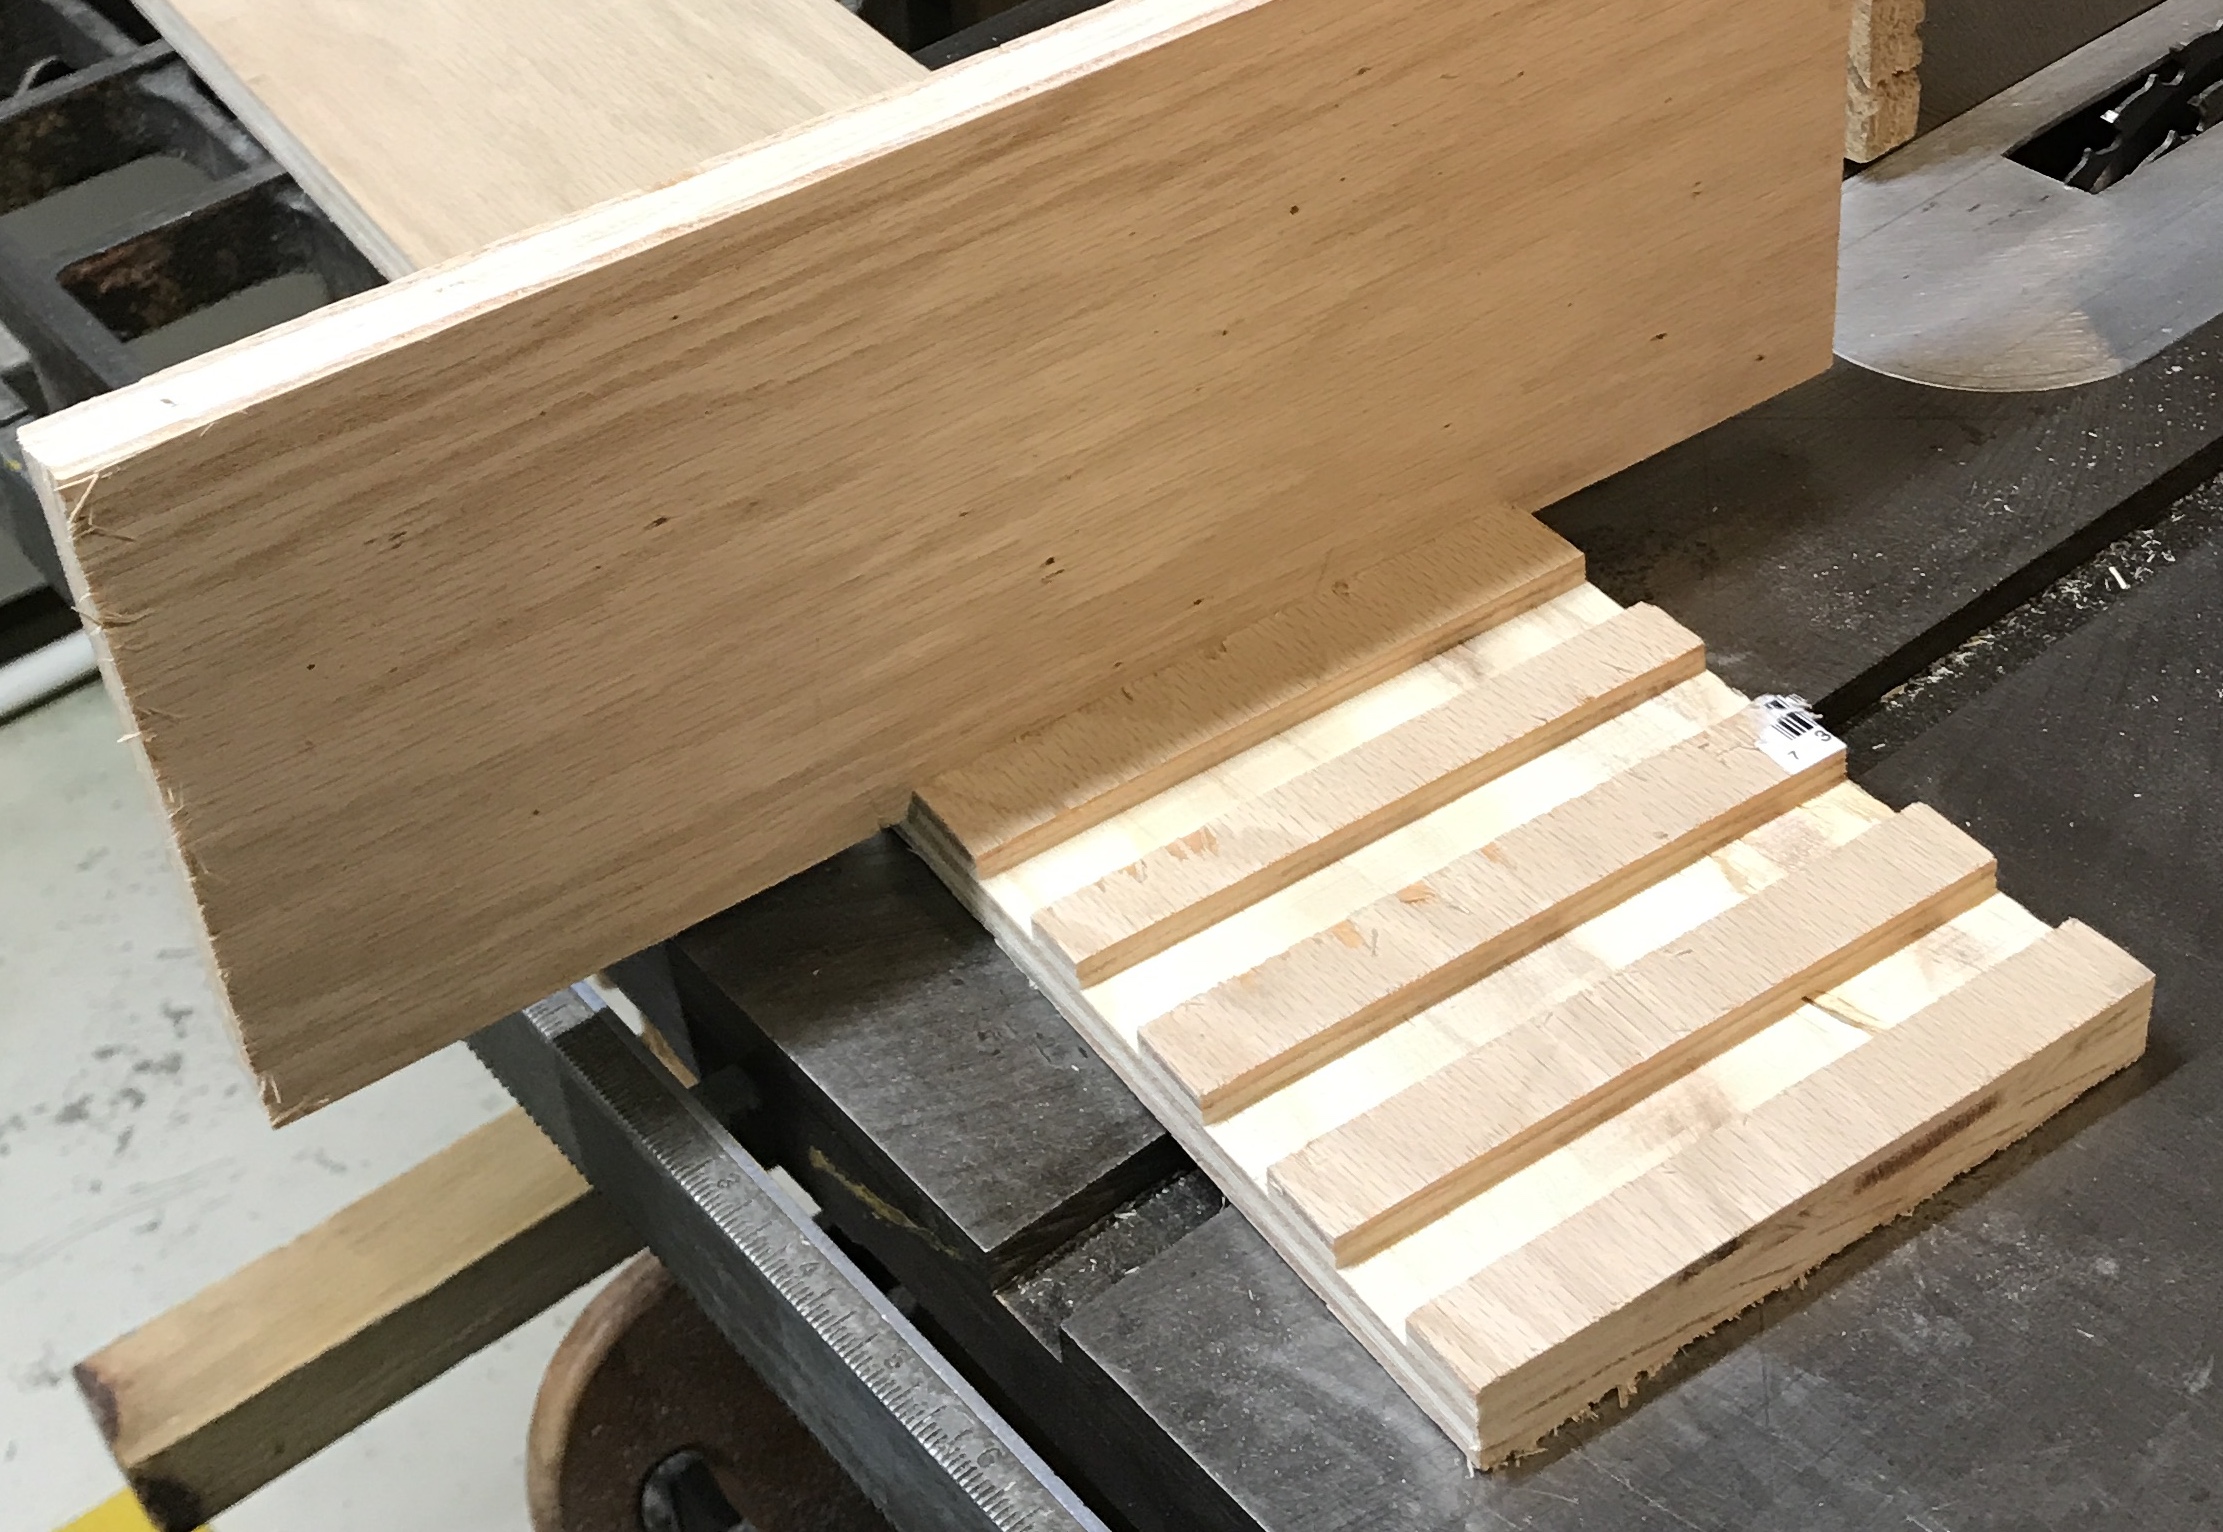
Cutting the dadoes is next. A dado stack was set up and tried in some cutoffs of the new plywood. More shims were progressively added and each was cut and tried for fit. The fifth time was a perfectly tight fit. A little convincing with a mallet drove the board home; a really snug fit. The photo below shows the progression of ever wider dadoes. Tomorrow the dadoes will be cut on four of the eight verticals. The dadoes should be cut from 10 9/16" to 11 9/32" so the top of the horizontal board in the dado ends up 12" high.
The fence had to be set up on the left side of the blade to get it 10 9/16" from the edge of the board. After measuring a test run showed the dado at the correct distance from the edge. The selected boards were labelled and taped. The dadoes were cut. Unfortunately, even with the tape there was significant tearout especially on the more exposed side. A lot of repair work to do! This completed all of the cutting except while selecting the boards for the dado one was found that was 1/16" too long. This board was trimmed after the dadoes were complete.
Edge banding is not easy. A piece of scrap was used first to gain some experience. It was held in the Sjoberg vise for easy access to the edge being worked on. This edge was sanded after the sides of the edge were gently sanded. A piece of edging was cut with scissors and held on the edge. After some experimentation a piece of aluminum foil draped over the edging could hold it in place during initial ironing. The foil on the edging was heated with the iron. If the iron is in one spot too long the edging will burn turning black. If the iron is not on long enough the glue does not sufficiently melt. After heating about 6-8" the area was pressed down. A wooden block was found to be the best method as it won't stray over the edge and break the excess. The next area is then heated and pressed down. The iron is next tilted at a slight angle and run along the edges to ensure complete bonding.
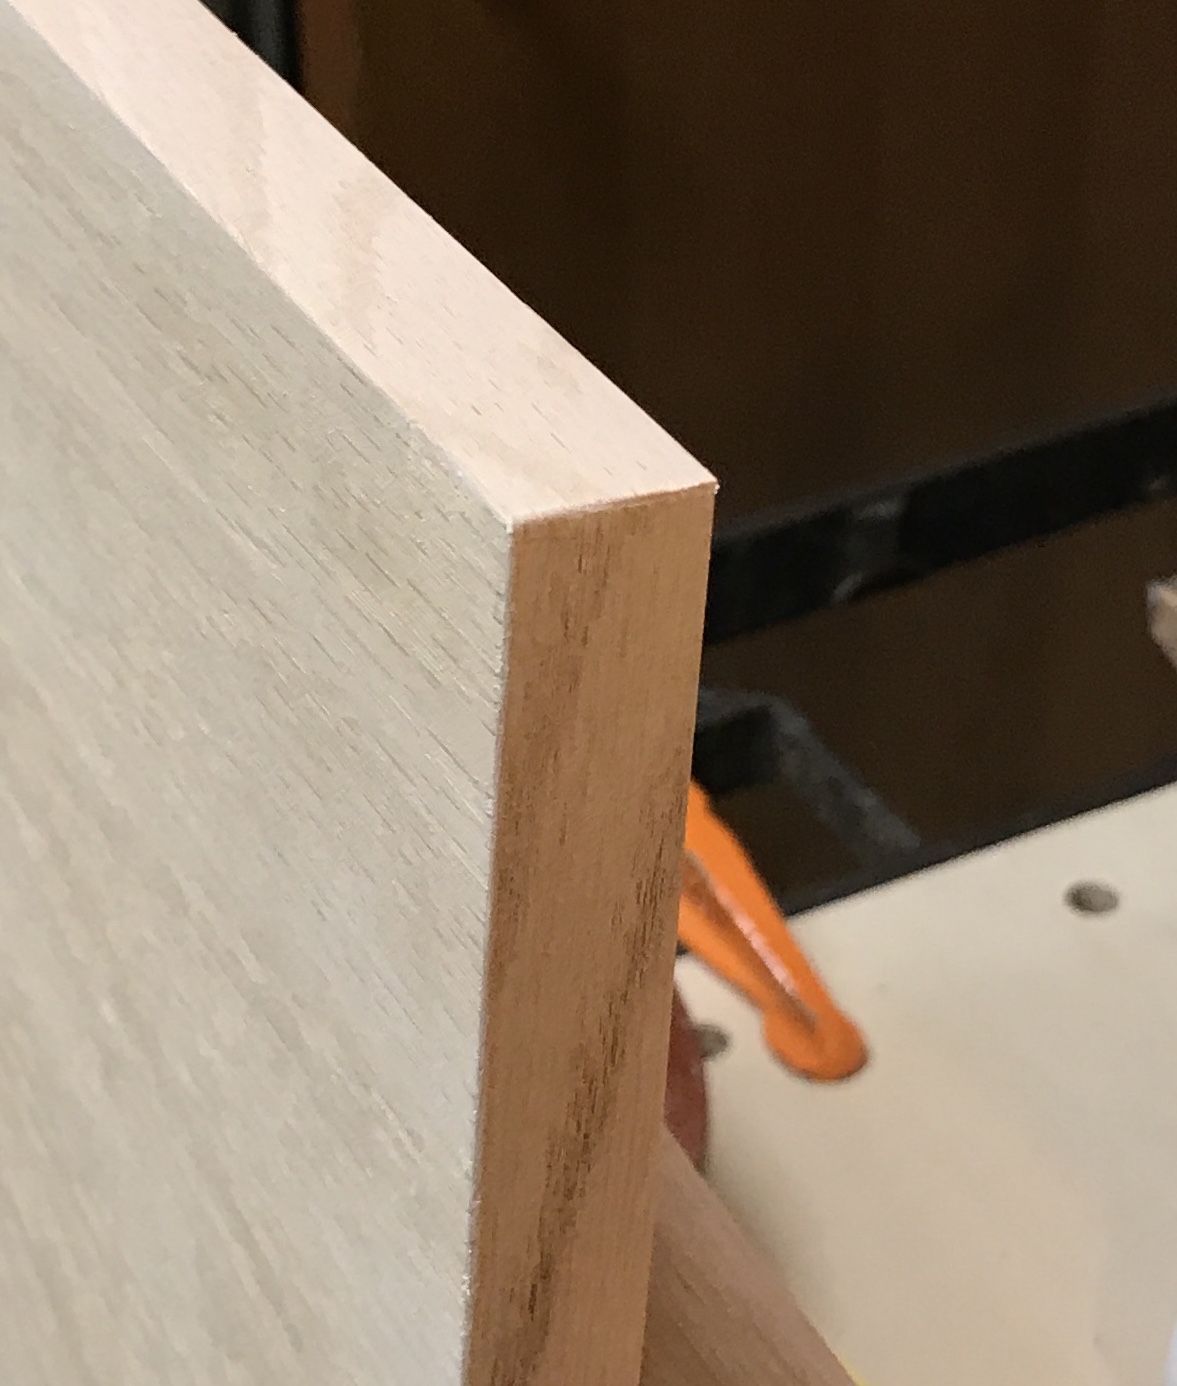
After cooling the excess at the ends is trimmed off with an Exacto knife. The edge trimmer was then used to remove the excess on the sides. This tool is a piece of crap! It seems to work better in one direction than the other. It leaves areas that are not trimmed sufficiently close cutting in either direction. Sometimes these areas can be further trimmed, but that is rare. Part of the problem is working with the grain and not against it. The trimmer can also dig into the veneer on the plywood causing nasty wounds. The areas insufficiently trimmed were cleaned up with careful filing. The edges are sanded at an angle to slightly round over the corner. It takes some extra effort to remove the glue that has squeezed out. With care it is difficult to tell it is veneer edging. At this point it takes about 30 minutes per strip. I need to label all of the edges that require it to make sure I don't edge the wrong ones. I smell like cooked oak! After some learning I am down to 15 minutes per strip, but I can only do four before I need a break. The photo below shows a twelve inch top that was edged on all four sides. The corner looks great except for the grain. There is of course no end grain edging.
So far 28 of 68 edges have been completed. All of the smaller parts are completed. Two of the dadoed parts are also done. The dado is cut out similarly to cutting off the overhanging bits on the ends. I am no longer using the file to clean up the edges. It is too easy to mar the face of the plywood. Sandpaper (150 grit) is used instead. It clogs quickly with the glue, but it is cheap and plentiful.
New president today!! Whoopee!! Biden and Harris were sworn in with no complications.
Two days later and 52 edges have been covered. All that are left are the bottoms, each with four edges to cover. I should be able to complete them tomorrow. The edging is now complete! The last of the cooked oak smell! After cleaning up the mess that is left I will take time to practice doweling butt joints.
Each board was inspected for dings and tearout. During the inspection the various pencil marks were erased. The wood putty on hand was dry as expected. Some was added to a small amount of water and mixed thoroughly. The putty was applied to each ding or tearout and the boards were set aside for the putty to dry. Of course most of the filling was done on the dado edges.
While the putty was drying doweling was practiced. All of the joints are corner joints except for the dado board which has a joint in the middle of the bottom board. I have 100 5/16" dowels and 24 joints, so each joint will get four dowels. As noted above the dowels will be set 1 3/4" in from the edge and will be spaced 3 1/2" apart. For the practice work 1/4" dowels will be used. The process is fairly simple. Holes are drilled in the end of one board and the jig is used to accurately transfer these holes to the mating face. A fence is used to set the correct distance from the edge. A depth stop is needed for the 1/4" practice drill and also for the 5/16" drill.
Depth stops were found and labelled. The doweling jig is straightforward to use. Hole locations were marked along the edge of a board. The jig is held such that fingers are positioned against the faces of the board with the 1/4" hole over a mark. A hole is drilled and the same process was repeated for the remaining three holes. Dowels are placed in the holes and the 1/4" hole in the jig is placed over a dowel. The fence is positioned tight to the board. The doweled edge is laid on top of the face of the second board to be drilled. The jig is used to align the depth of the board edges by sliding a dowel into a slot and pushing the fence up to the edge of the second board. This is repeated with a dowel at the other end to make sure the boards are square. One end of the two boards is aligned at the same time. The boards are clamped and the holes are drilled with the fence pushed up against the second board and a dowel inserted in the 1/4" slot.
I did not do a good enough job of holding things in place on the first attempt and the boards mated slightly askew. The second time was a more puzzling result. One board overhung the other by about 1/16". Then I realized that care must be taken in setting the fence after drilling the first holes. The fence must be set from the correct side. It is unclear why the holes were not drilled in the exact center of the board's edge, but measuring on the correct face is always the best thing to do. The third time was a charm and the two boards mated perfectly. Making the real joints will need to be slow and methodical so no mistakes are made. All boards will be laid out and marked out in advance.
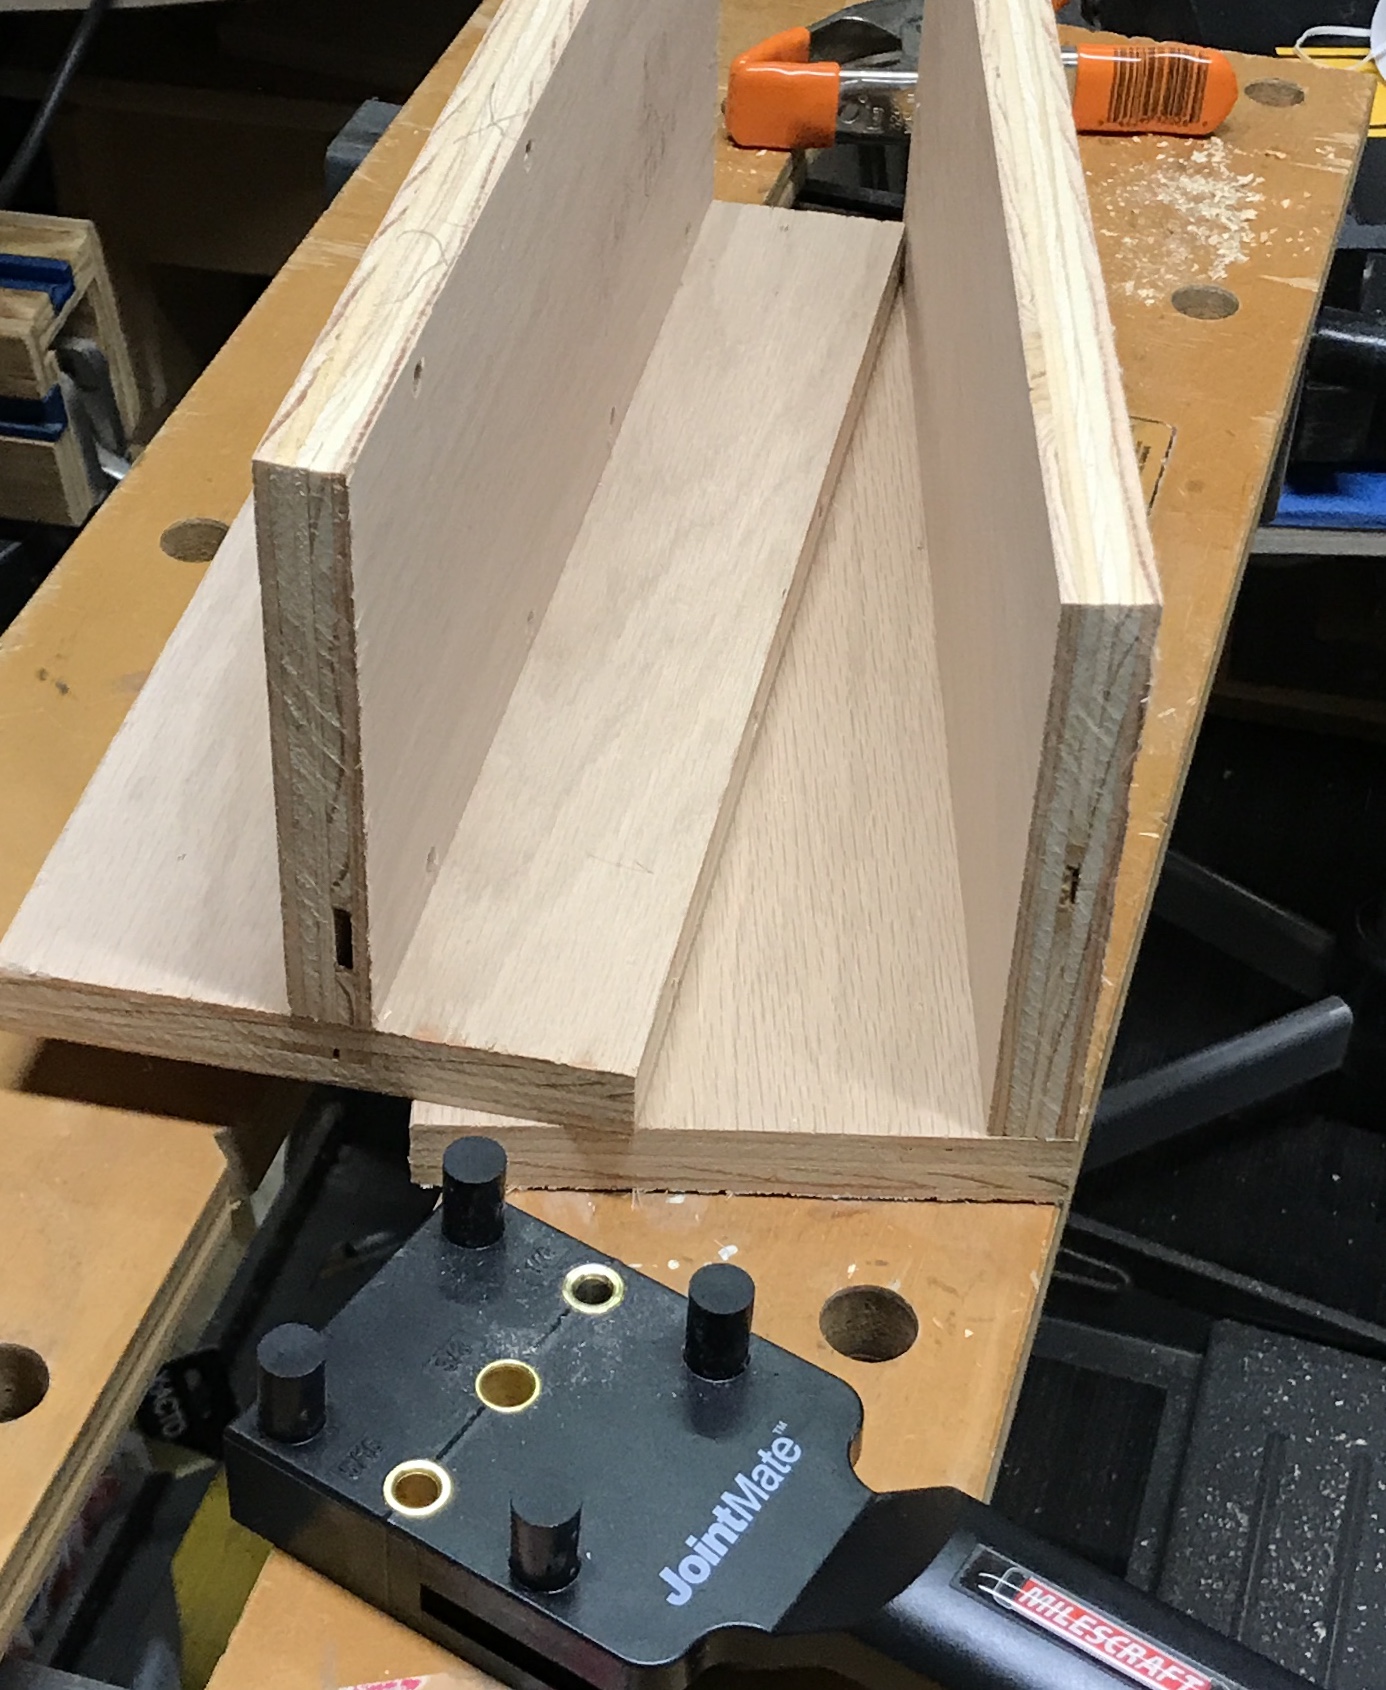
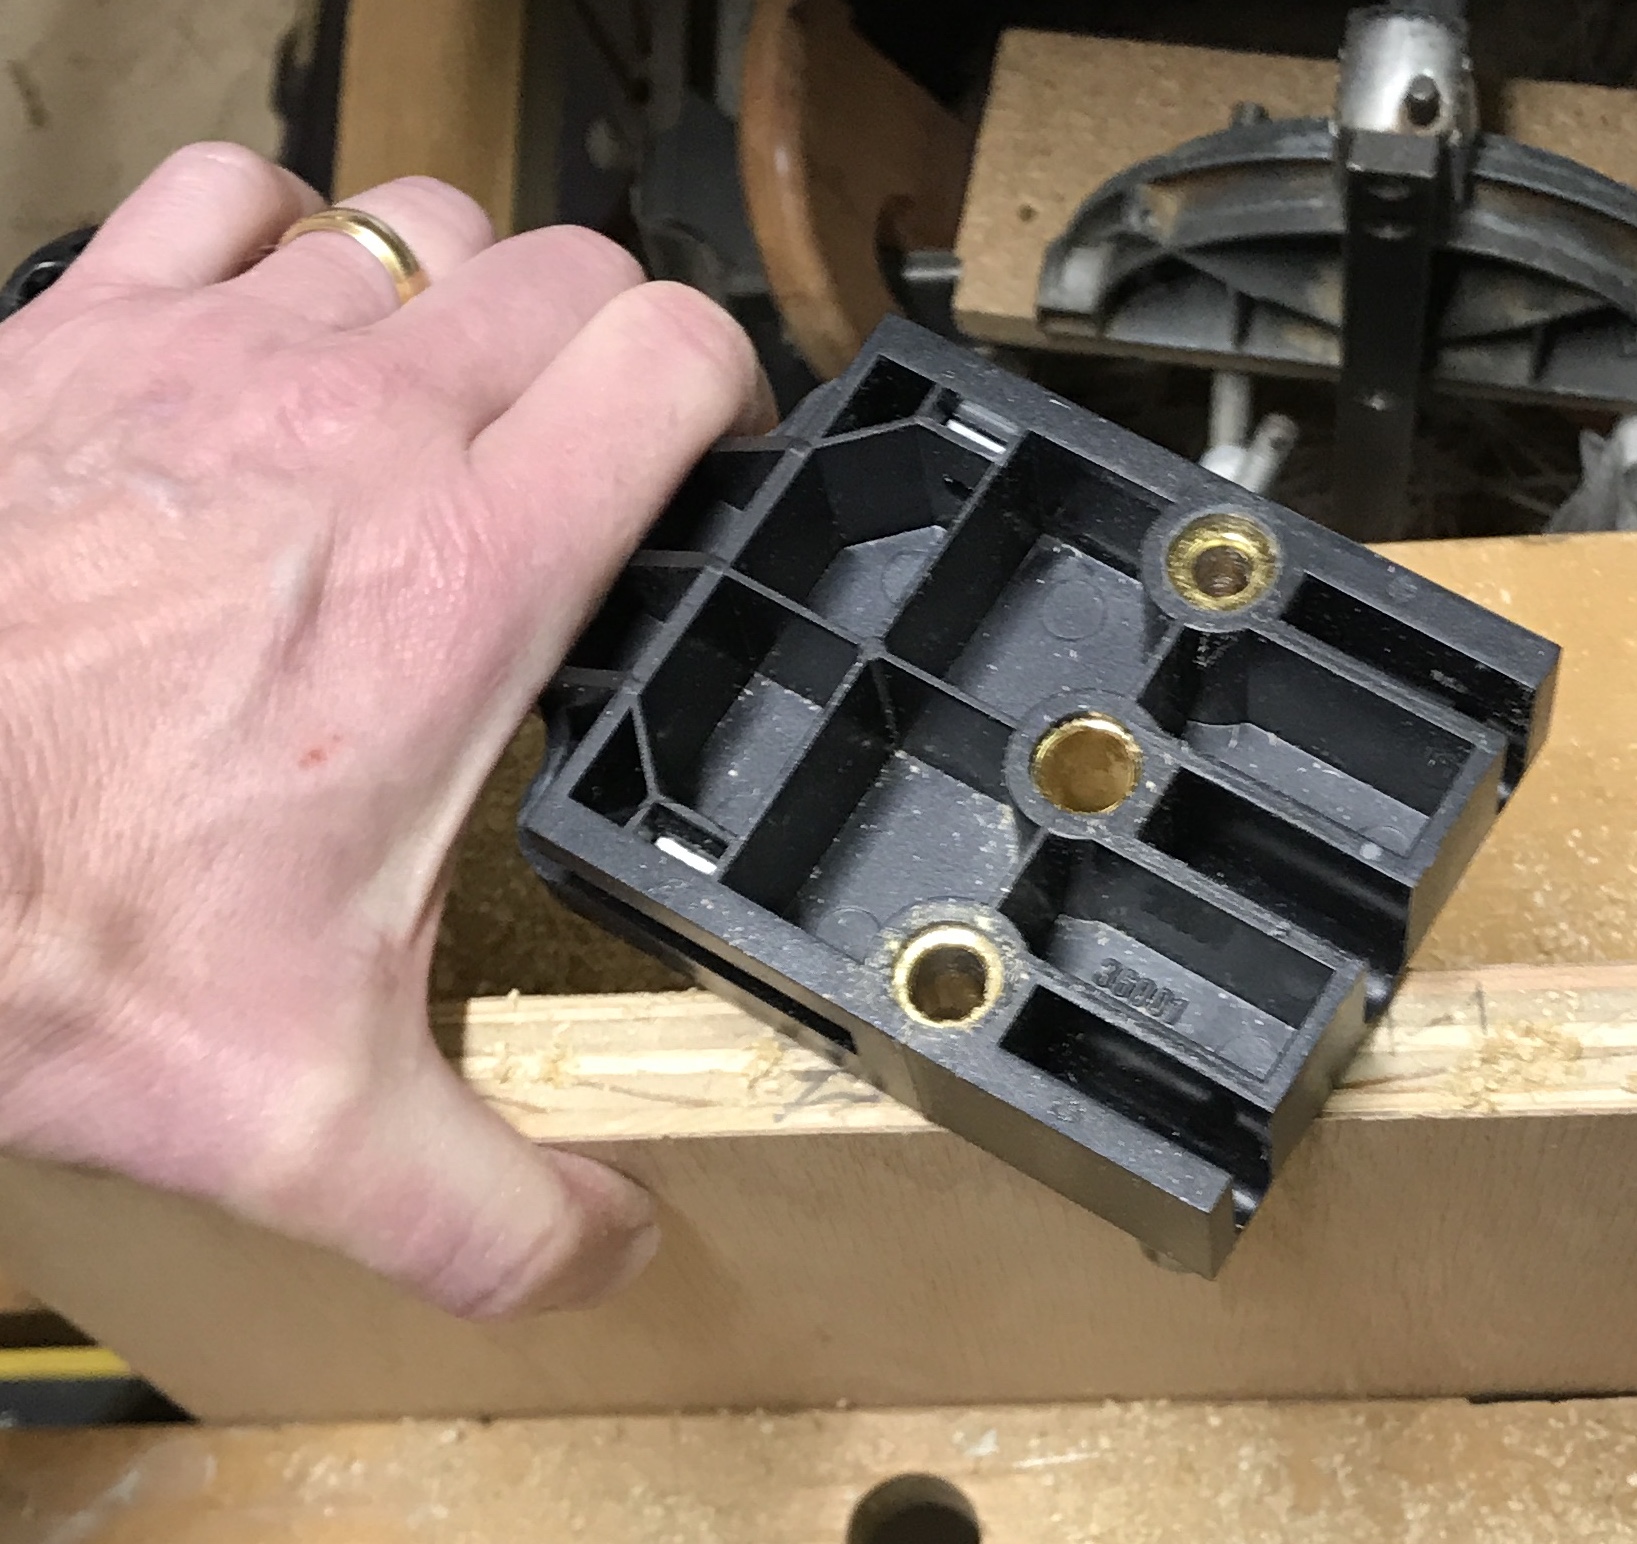
Discovered the hard way that the jig's handle can get in the way of finding center. The picture below shows the correct way to hold the jig for the 5/16" drill hole. If held on the other side the handle prevents one of the prongs from contacting the face of the board.
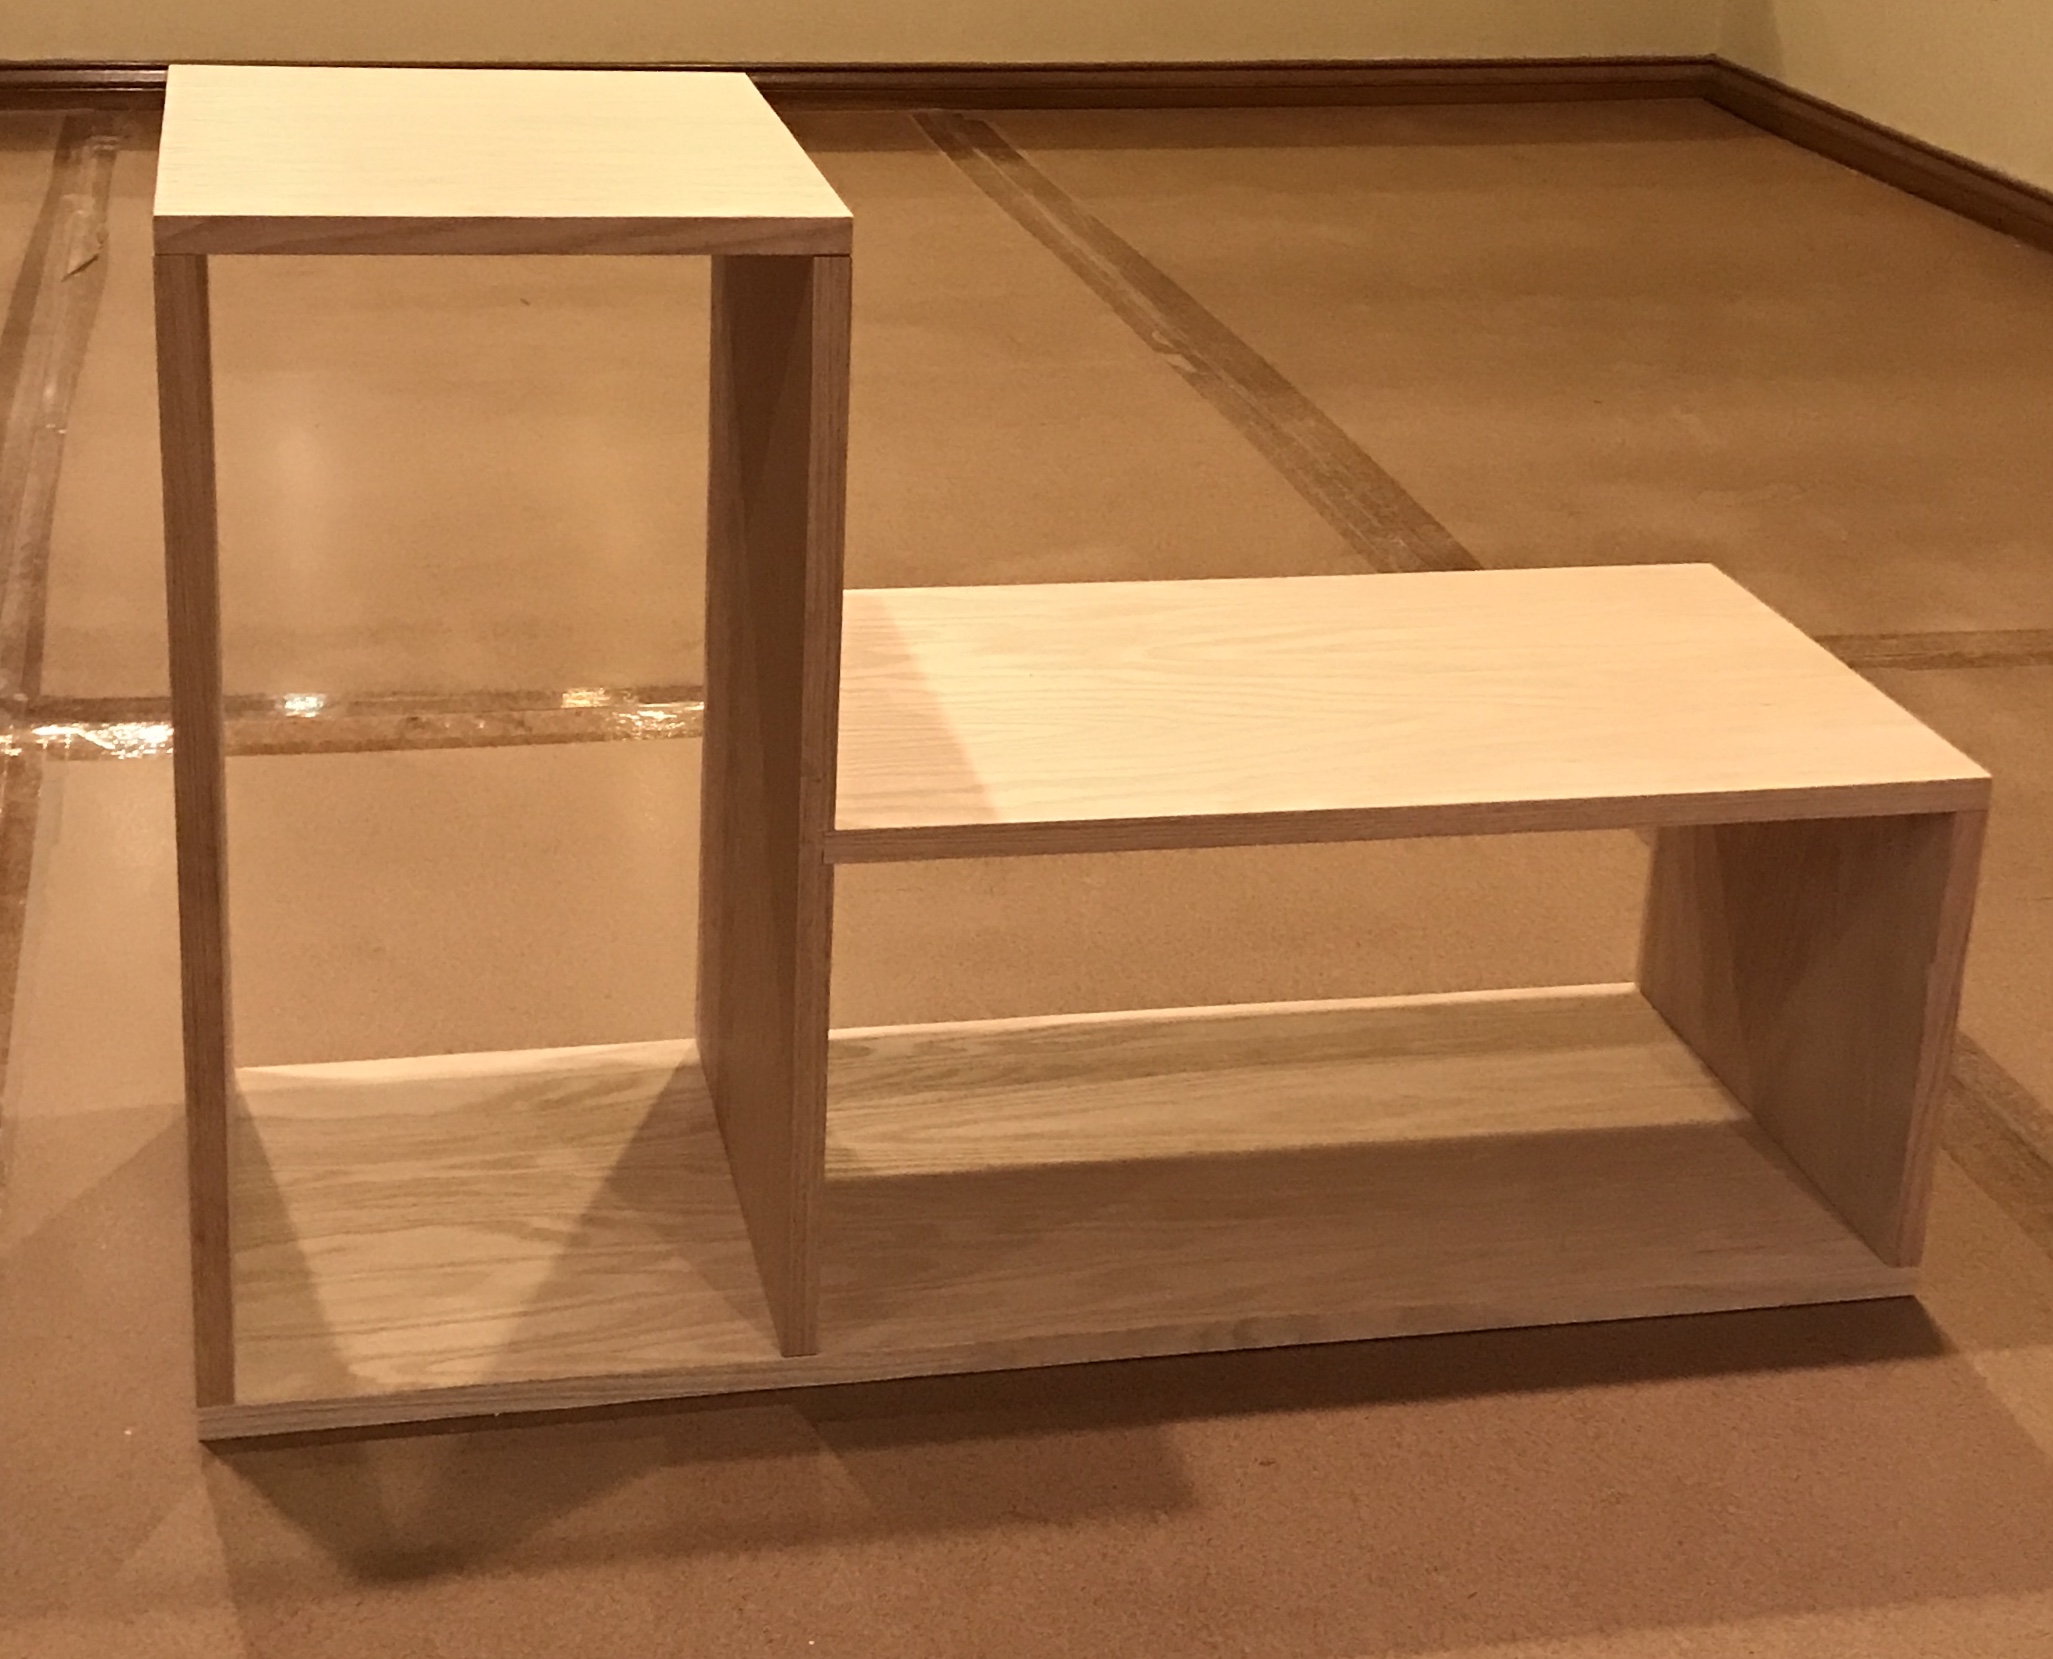
A set of six boards were laid out in the shape of the box shelves. All of the six joints were marked by set(W-Z), board(A-F), joint(1-6), and edge/face(1/2). The "surface" doweled joint was practiced. Essentially it differs by laying out a line for the locations of the holes and a line on the jig is aligned with this line. The first set of shelves was marked and drilled. The stop was set to 15/16" and all of the "grain" ends of the boards were drilled. The fence was reset at 9/16" and all of the faces were drilled. The surface joint in the middle of the bottom board was drilled last. The line was marked based on the length of the board going into the dado. The photo below shows the first set assembled, but not glued.
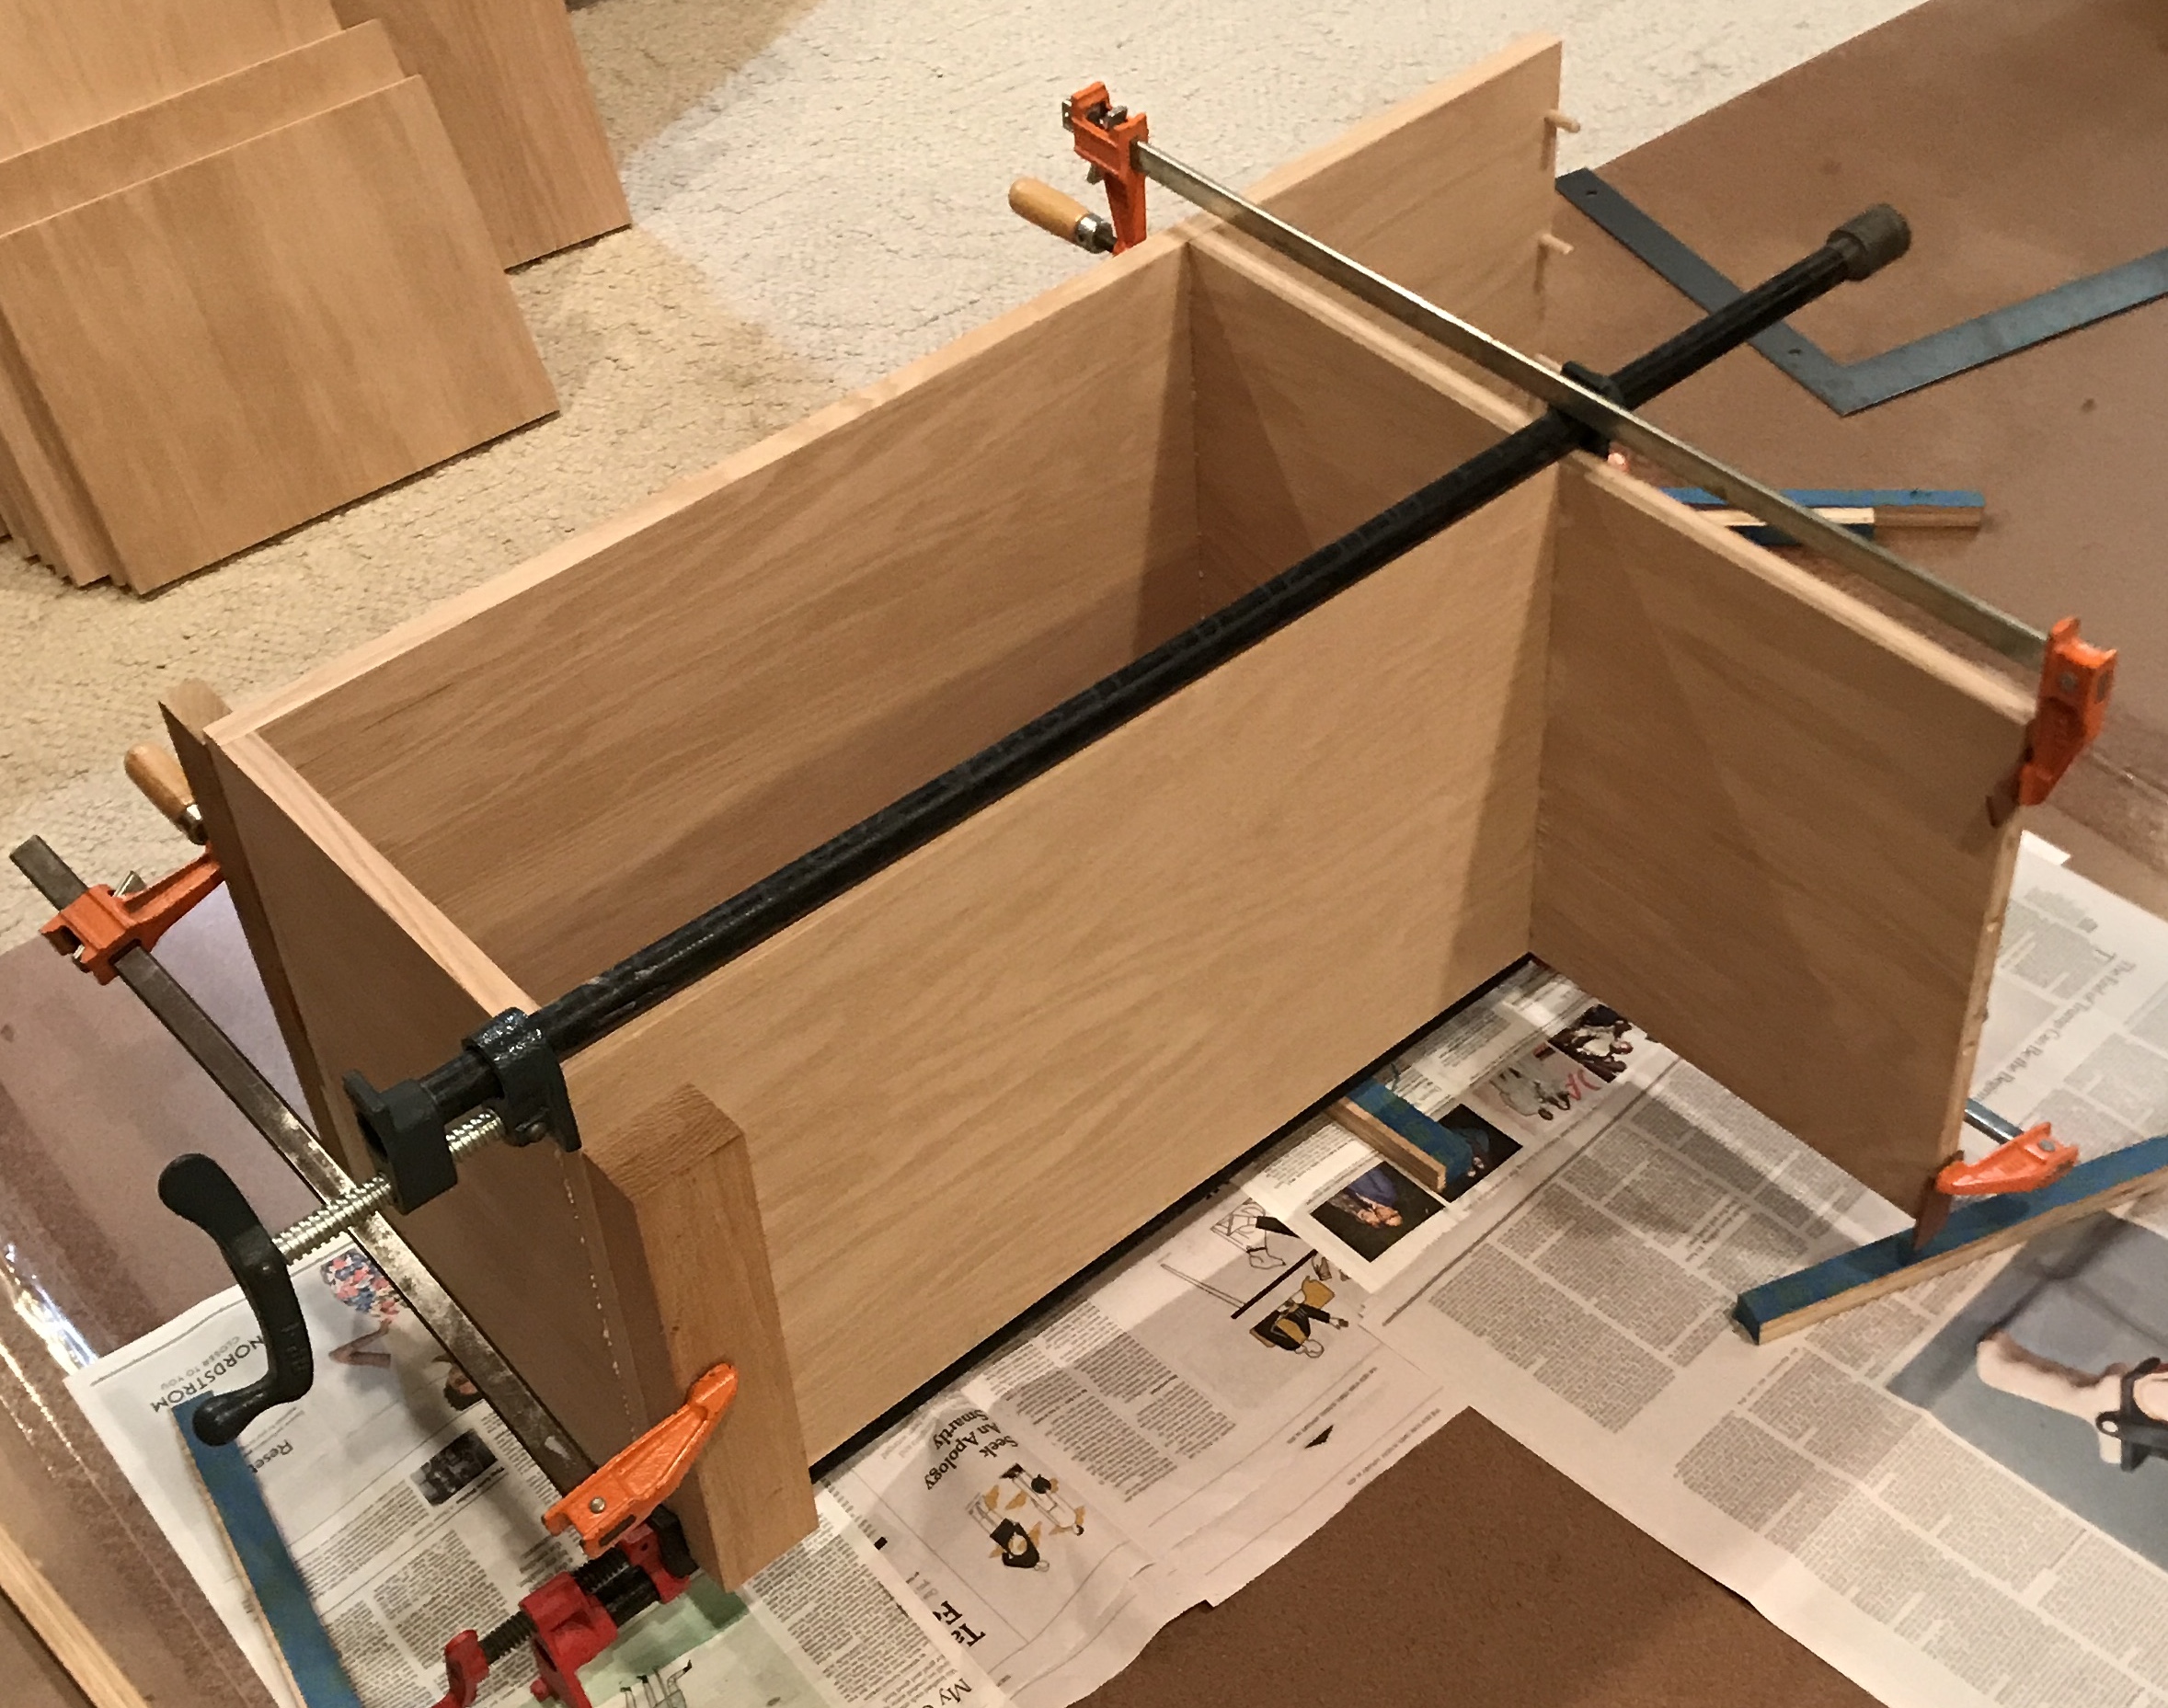
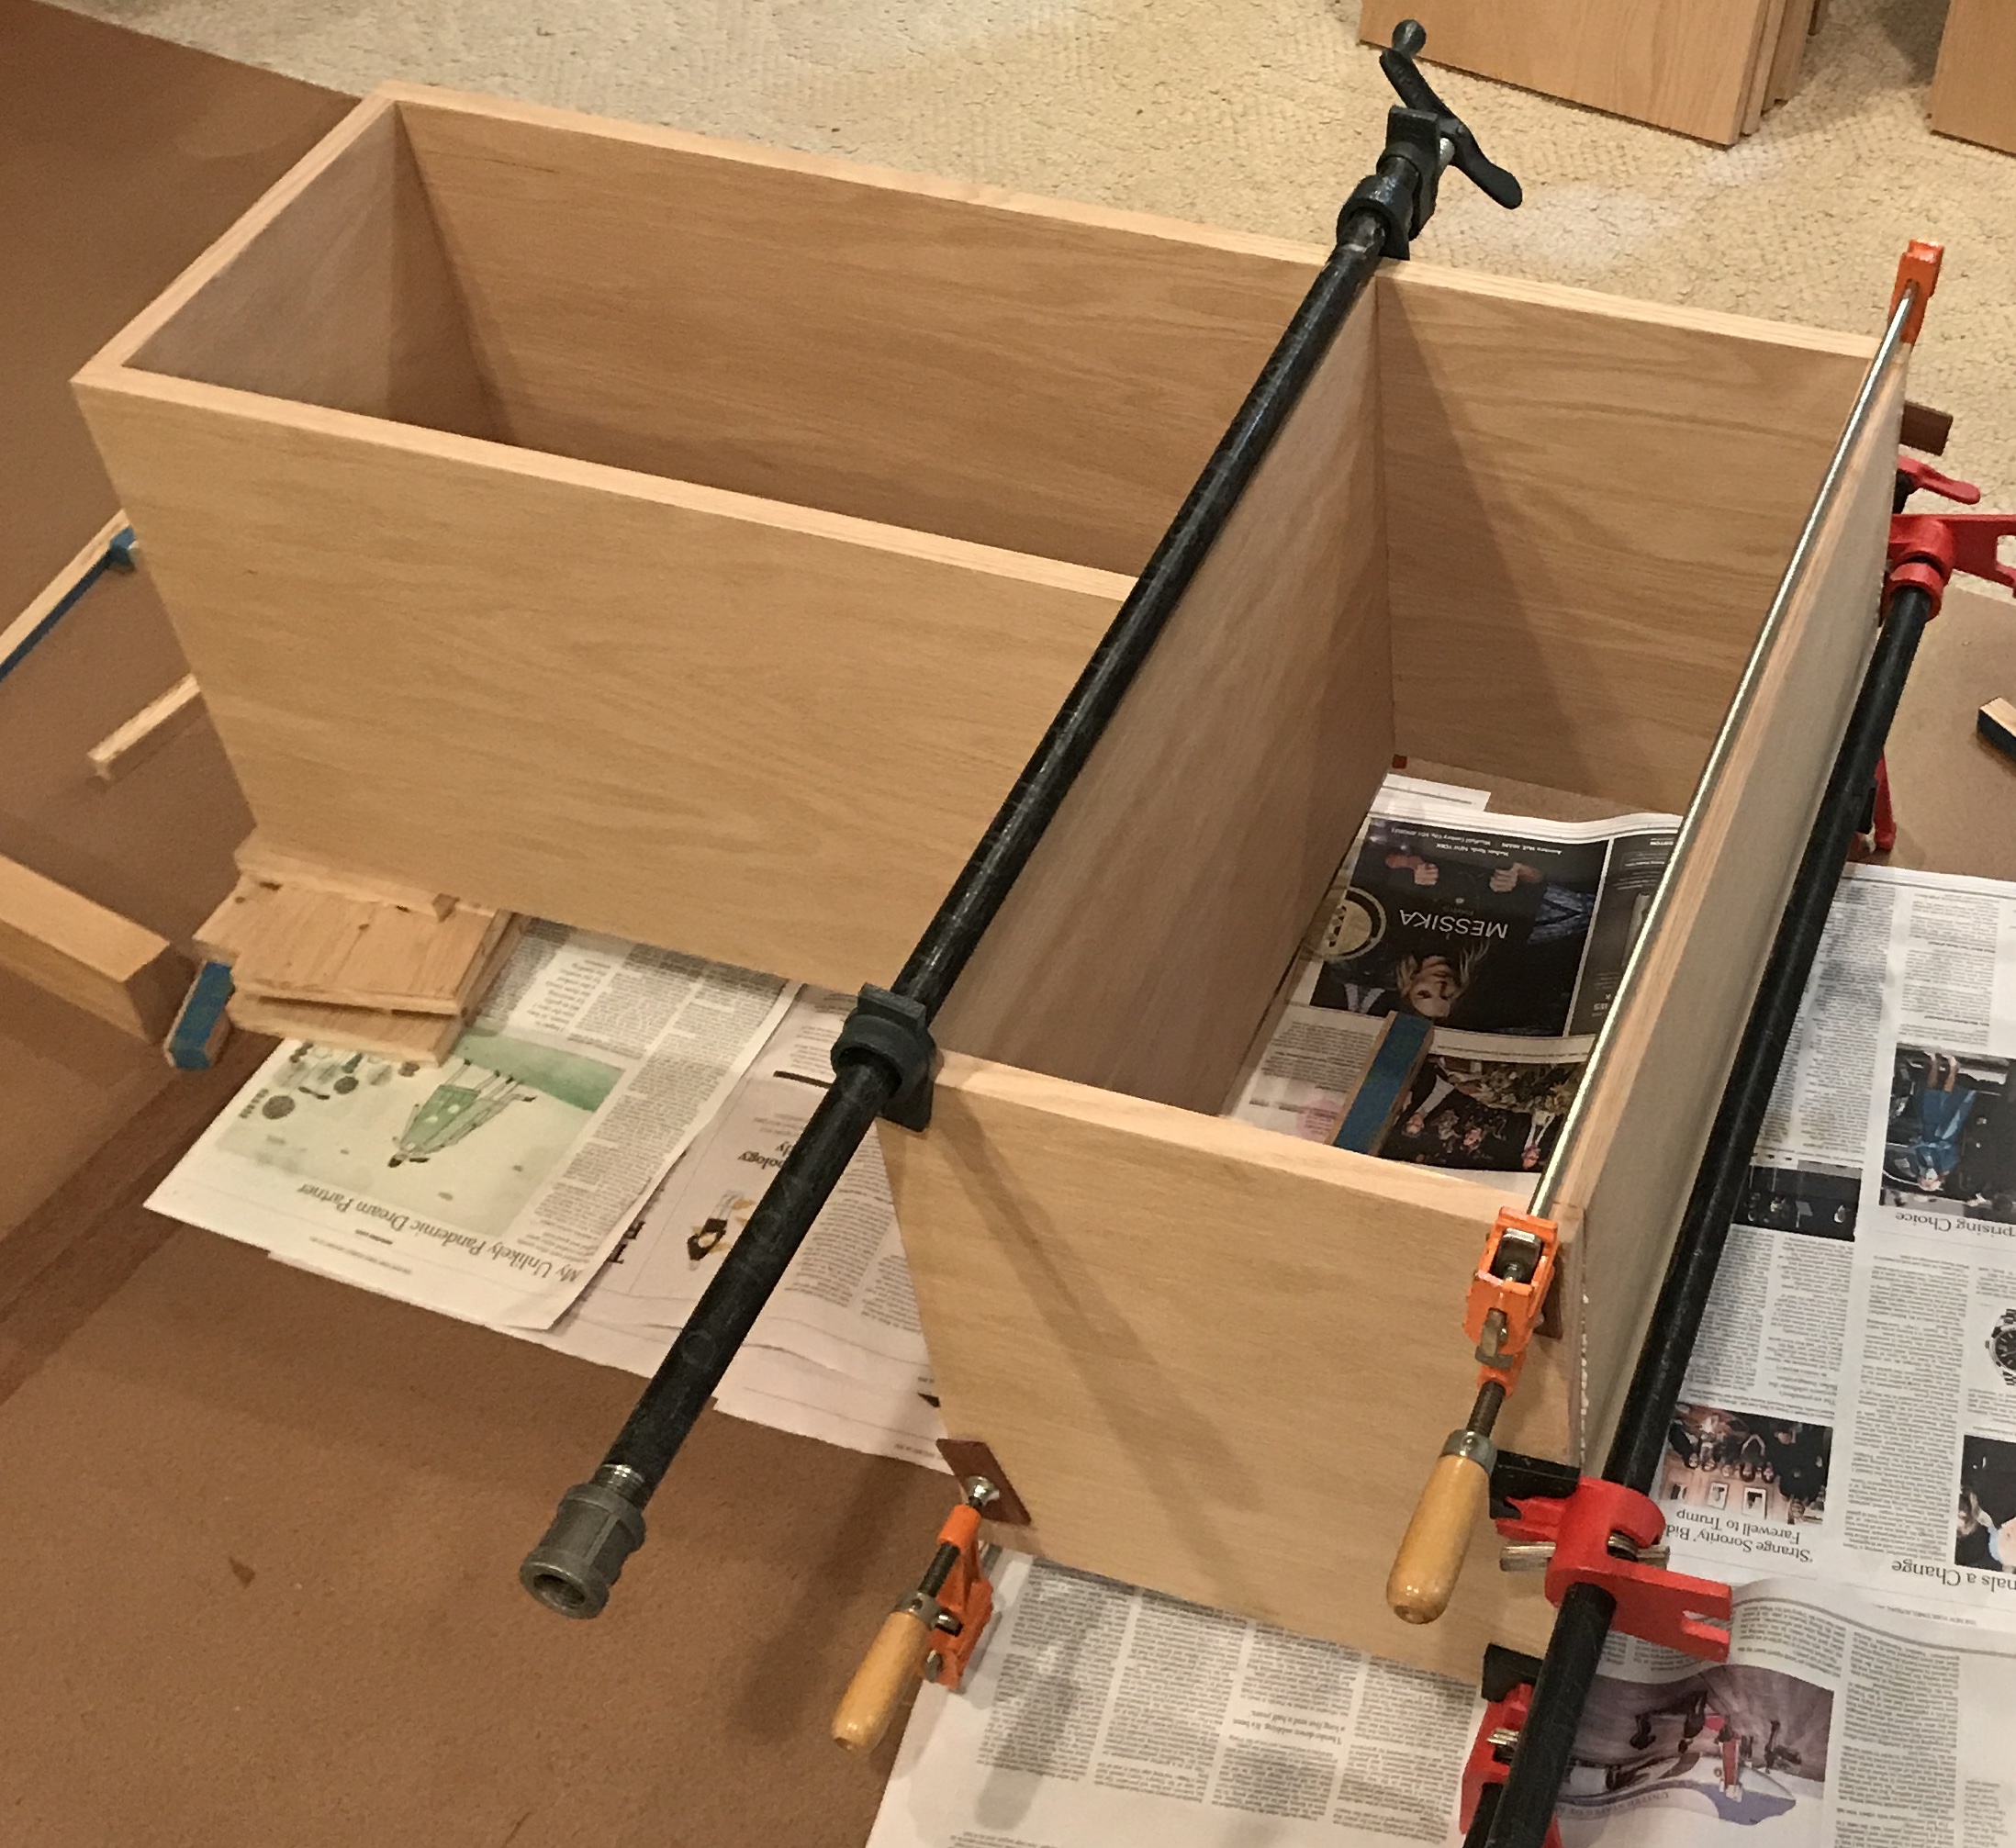
After a gluing mockup glue was applied to the short end and the middle/dado. These four pieces were clamped for thirty minutes. Squareness was checked at the juncture of the bottom and the dadoed vertical. After removing the clamps the last two pieces were glued and clamped. The following two pictures show the two different clamping sessions. During the thirty minute periods the second set of shelves was drilled. It was then similarly glued in two waves.
The last two sets were drilled and glued today the 26th. After they dry for a bit the glue will be scraped off. Touch up here and there should complete the four box shelves.
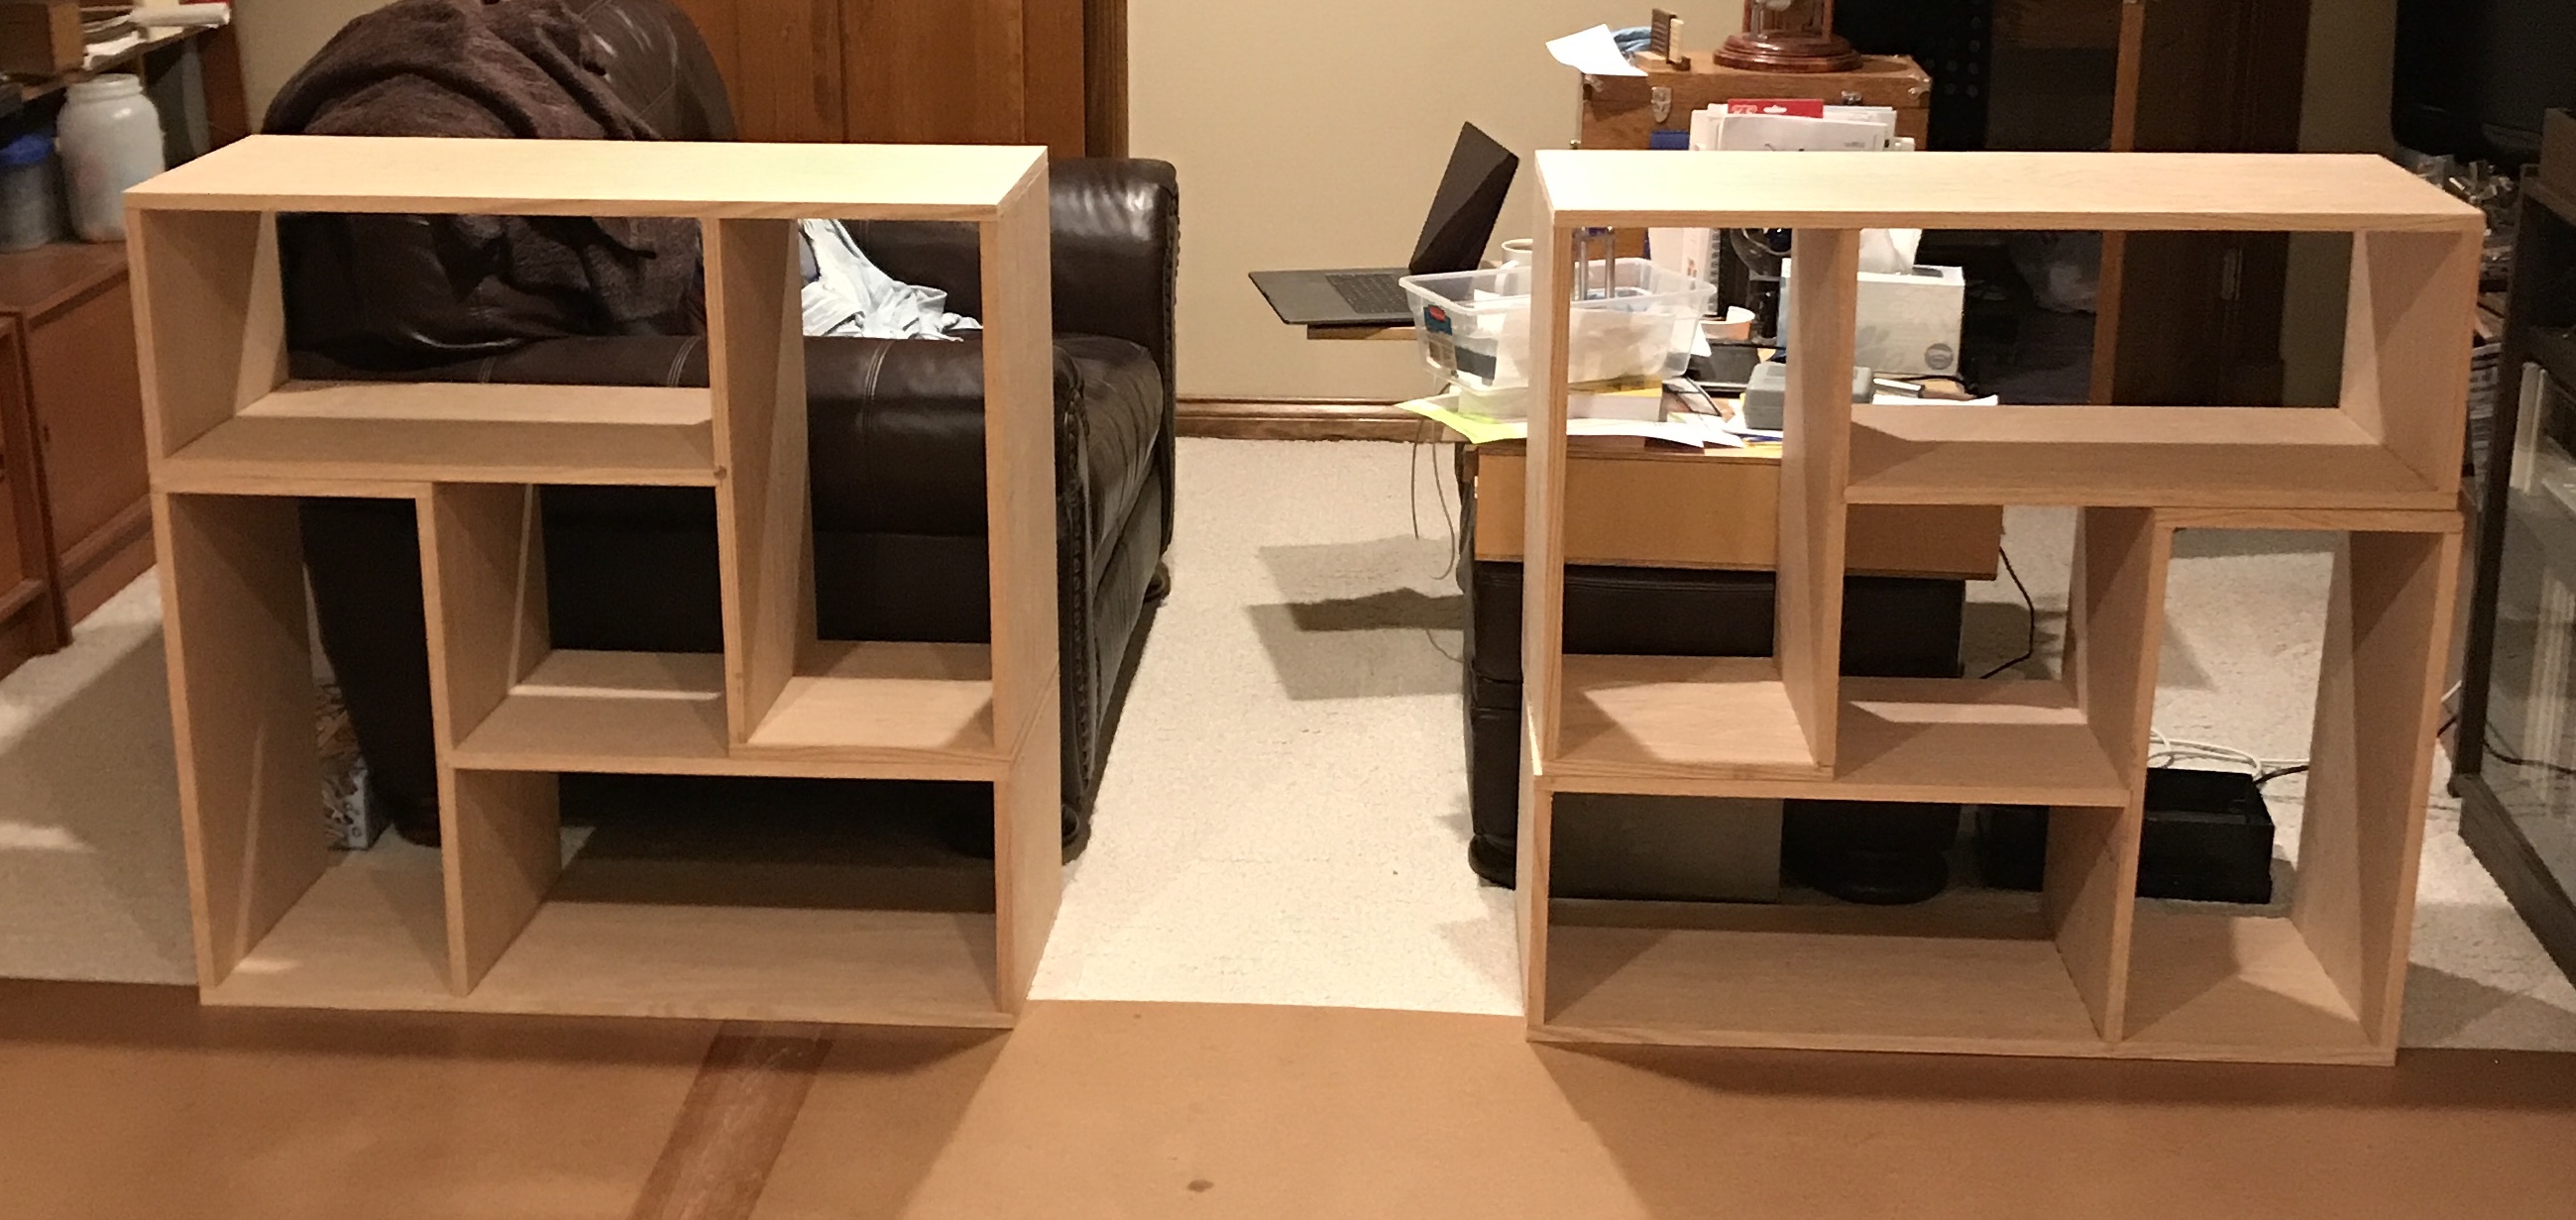
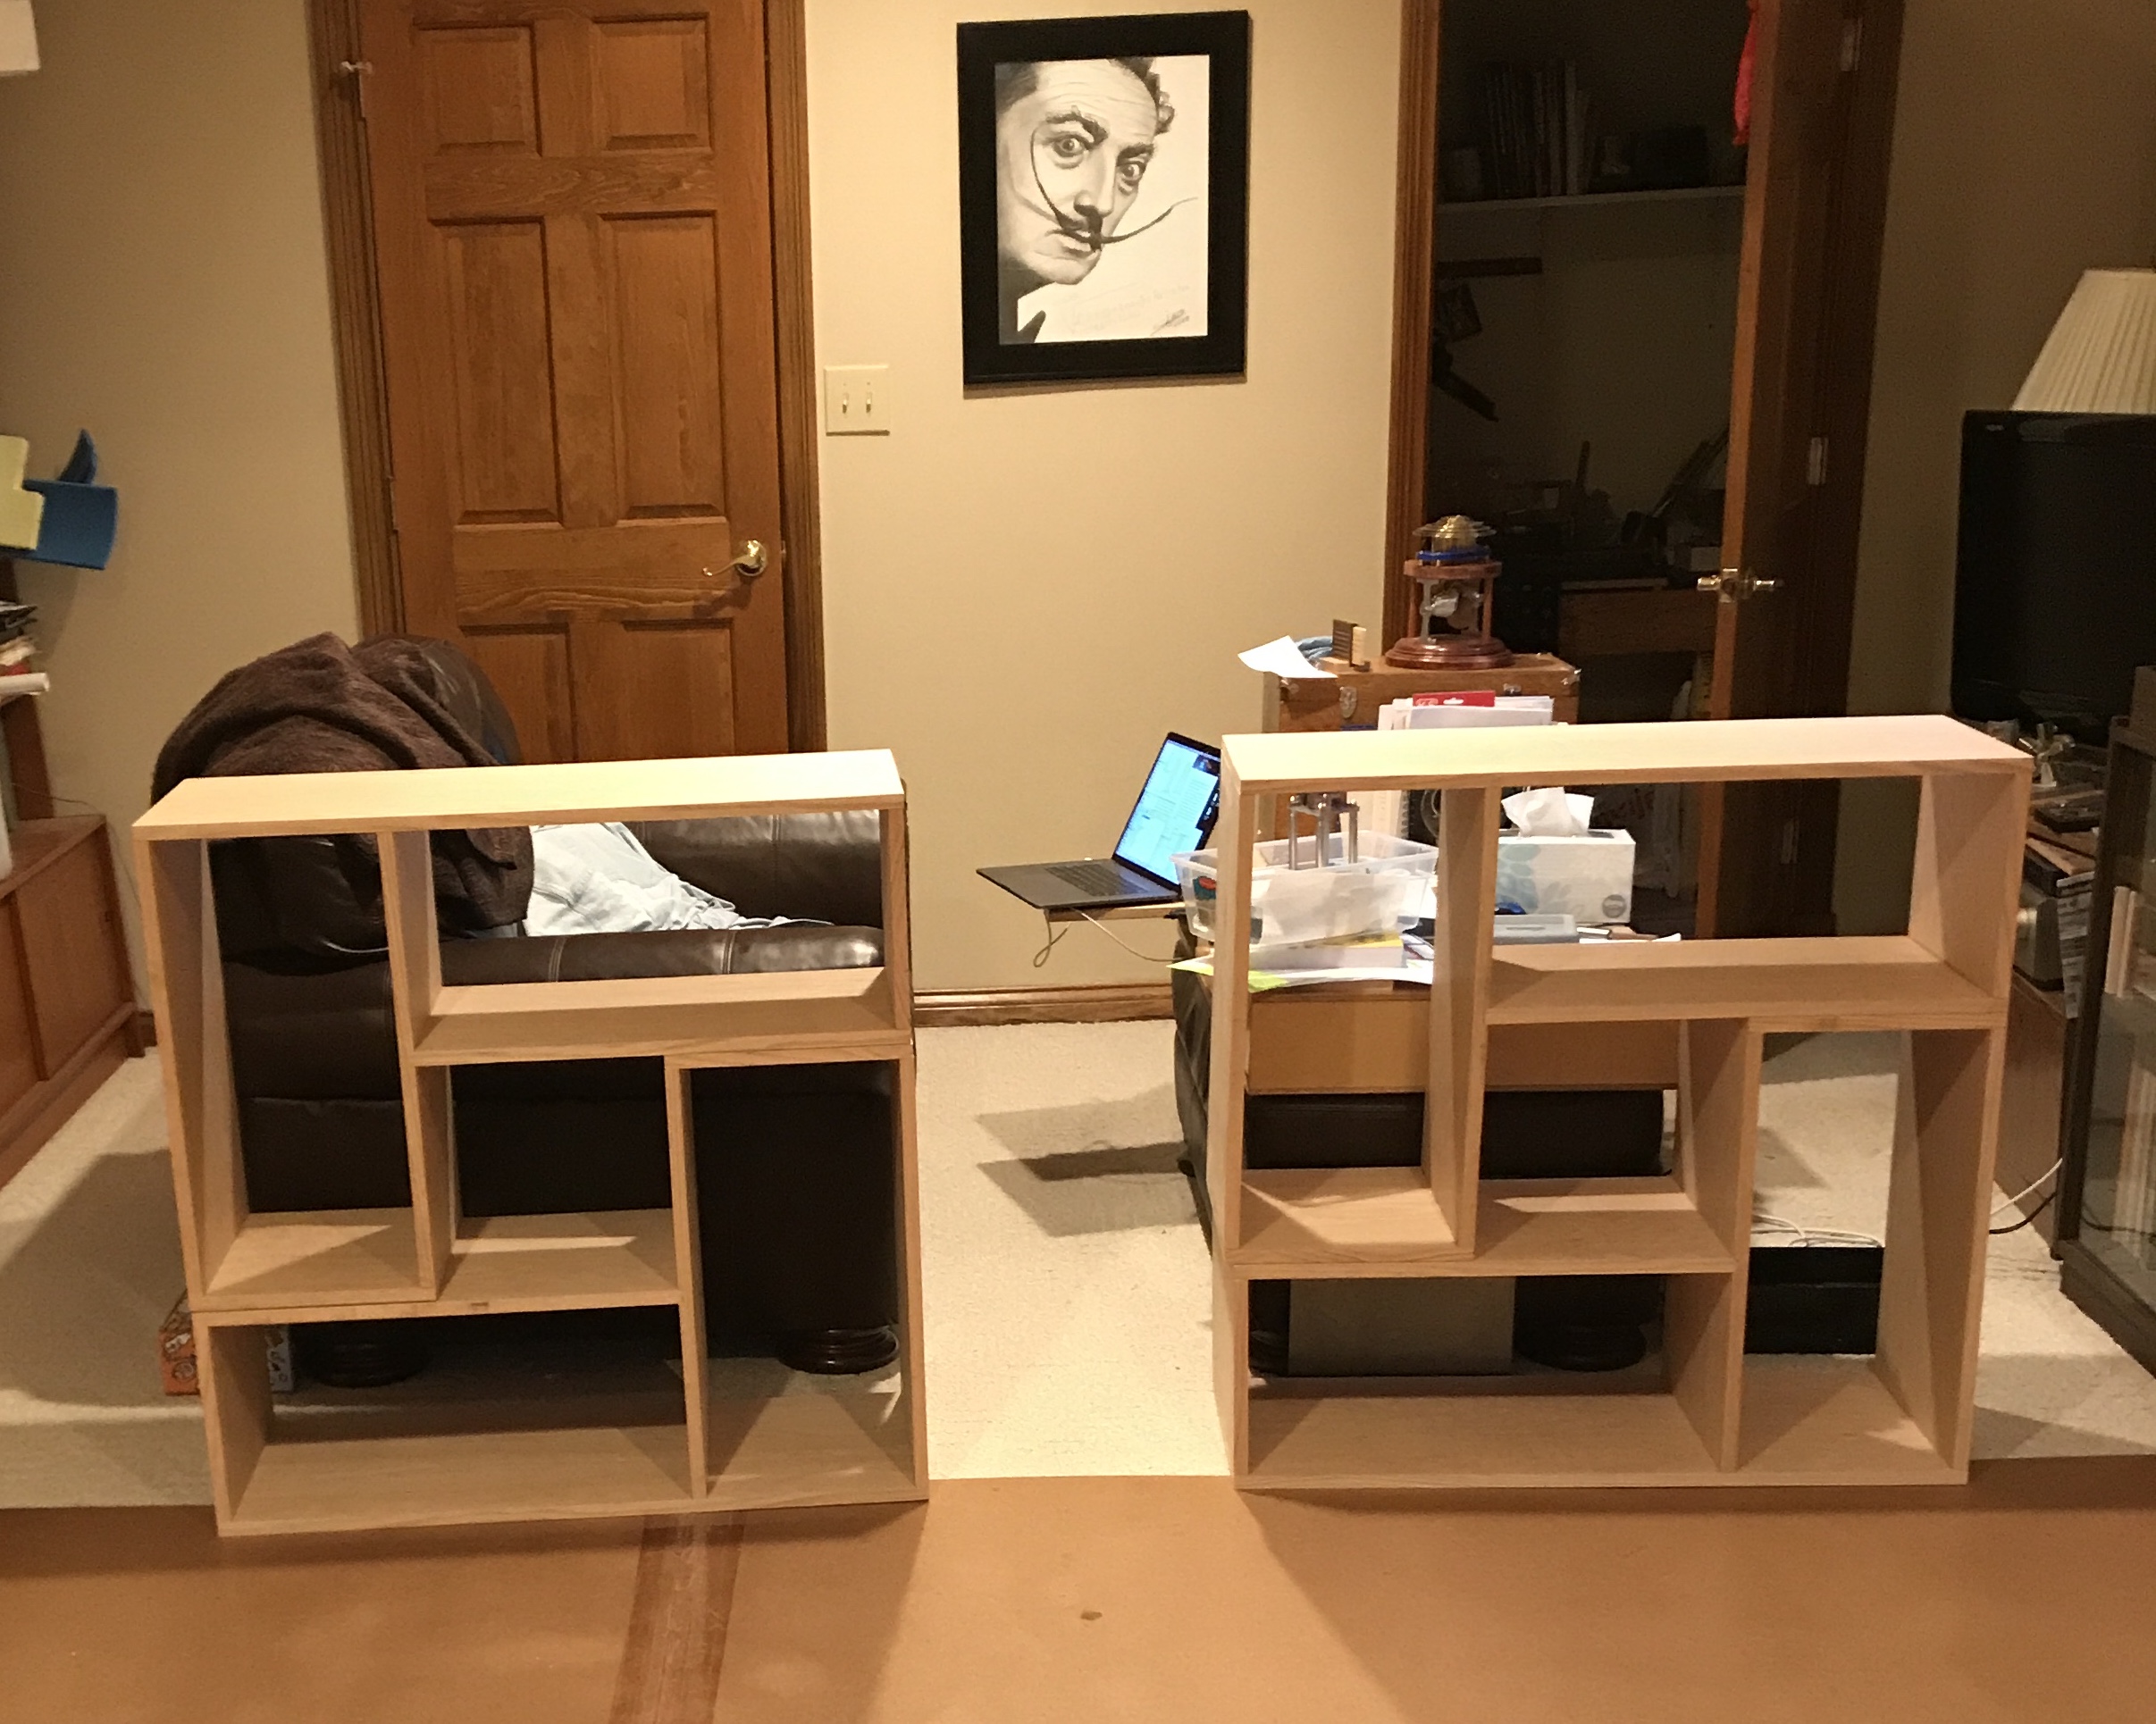
Spent about an hour on each set of shelves removing glue squeeze out and sanding rough spots. A number of joints did not come out as precisely as during mock assembly. In any event they are complete. After the last reglue dried a photo was taken of the four completed units. It was sent to Sandy and a pickup is scheduled for Friday afternoon.
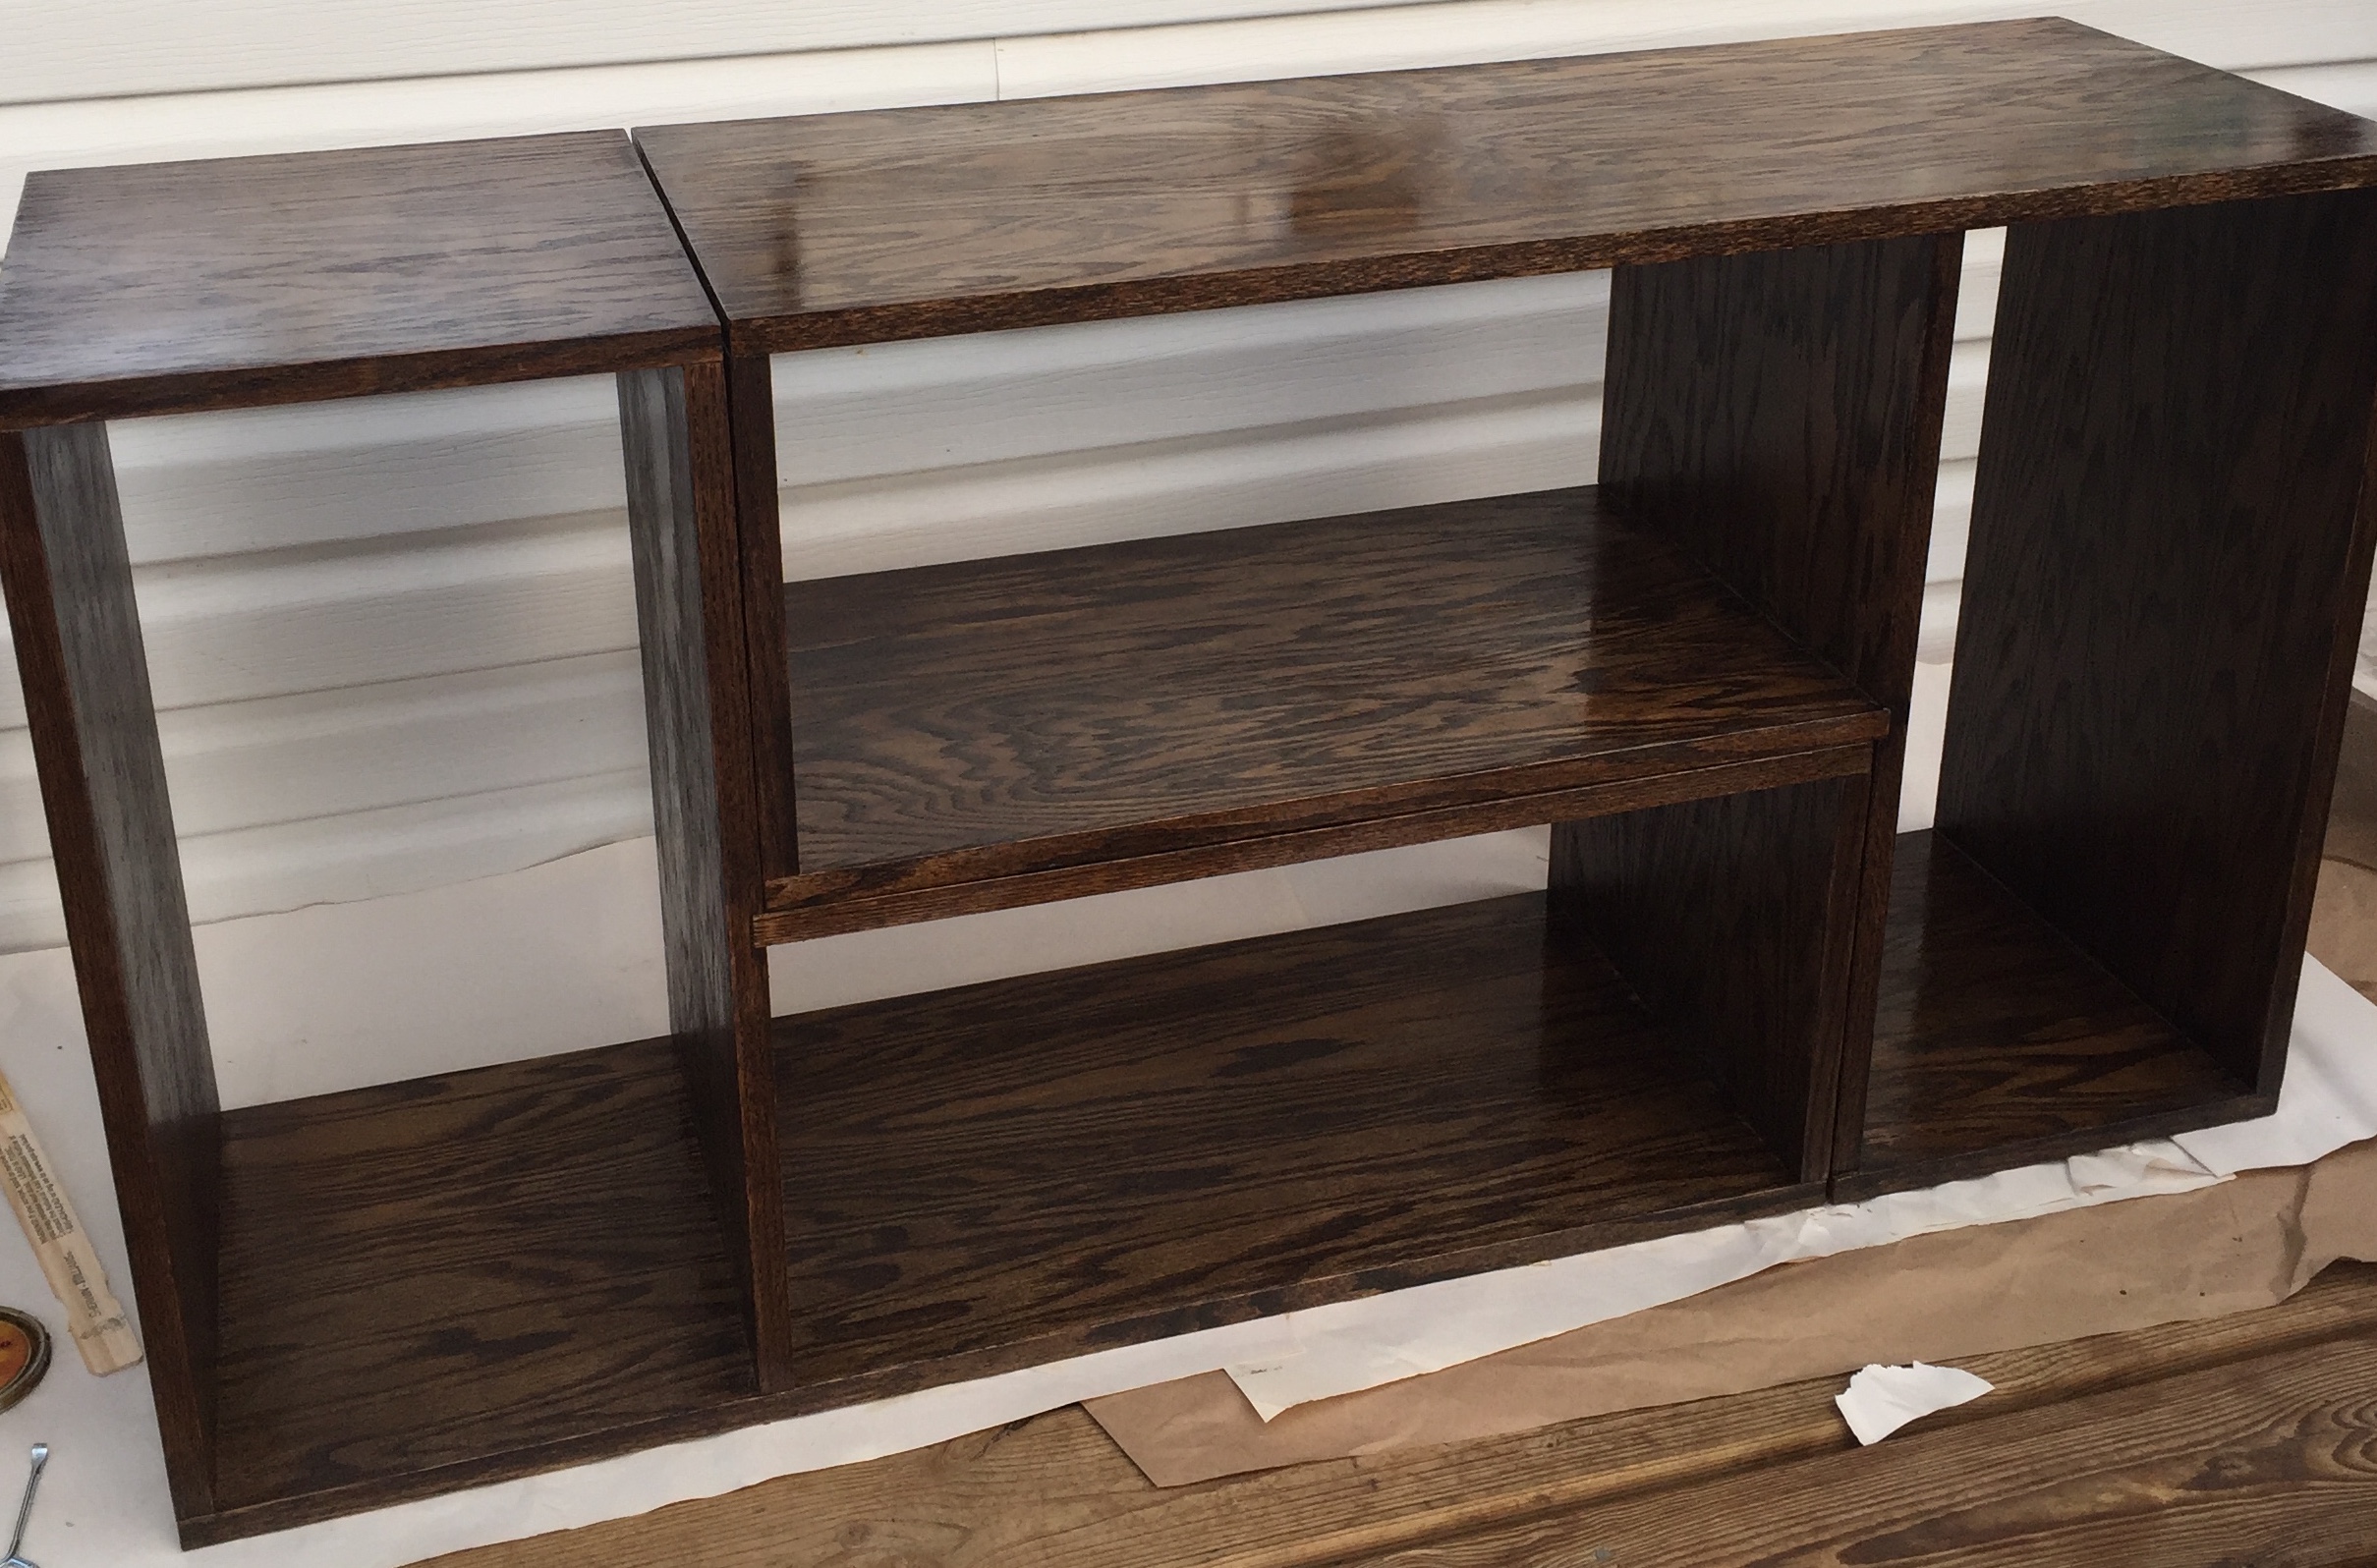
Sandy and Erin stained and varnished the box shelves as seen in the photo below.